Learn how to group or segment your links in an email using Maileon. Follow these steps to enhance your email marketing strategy and customize your email content.
1. Select an element with a link
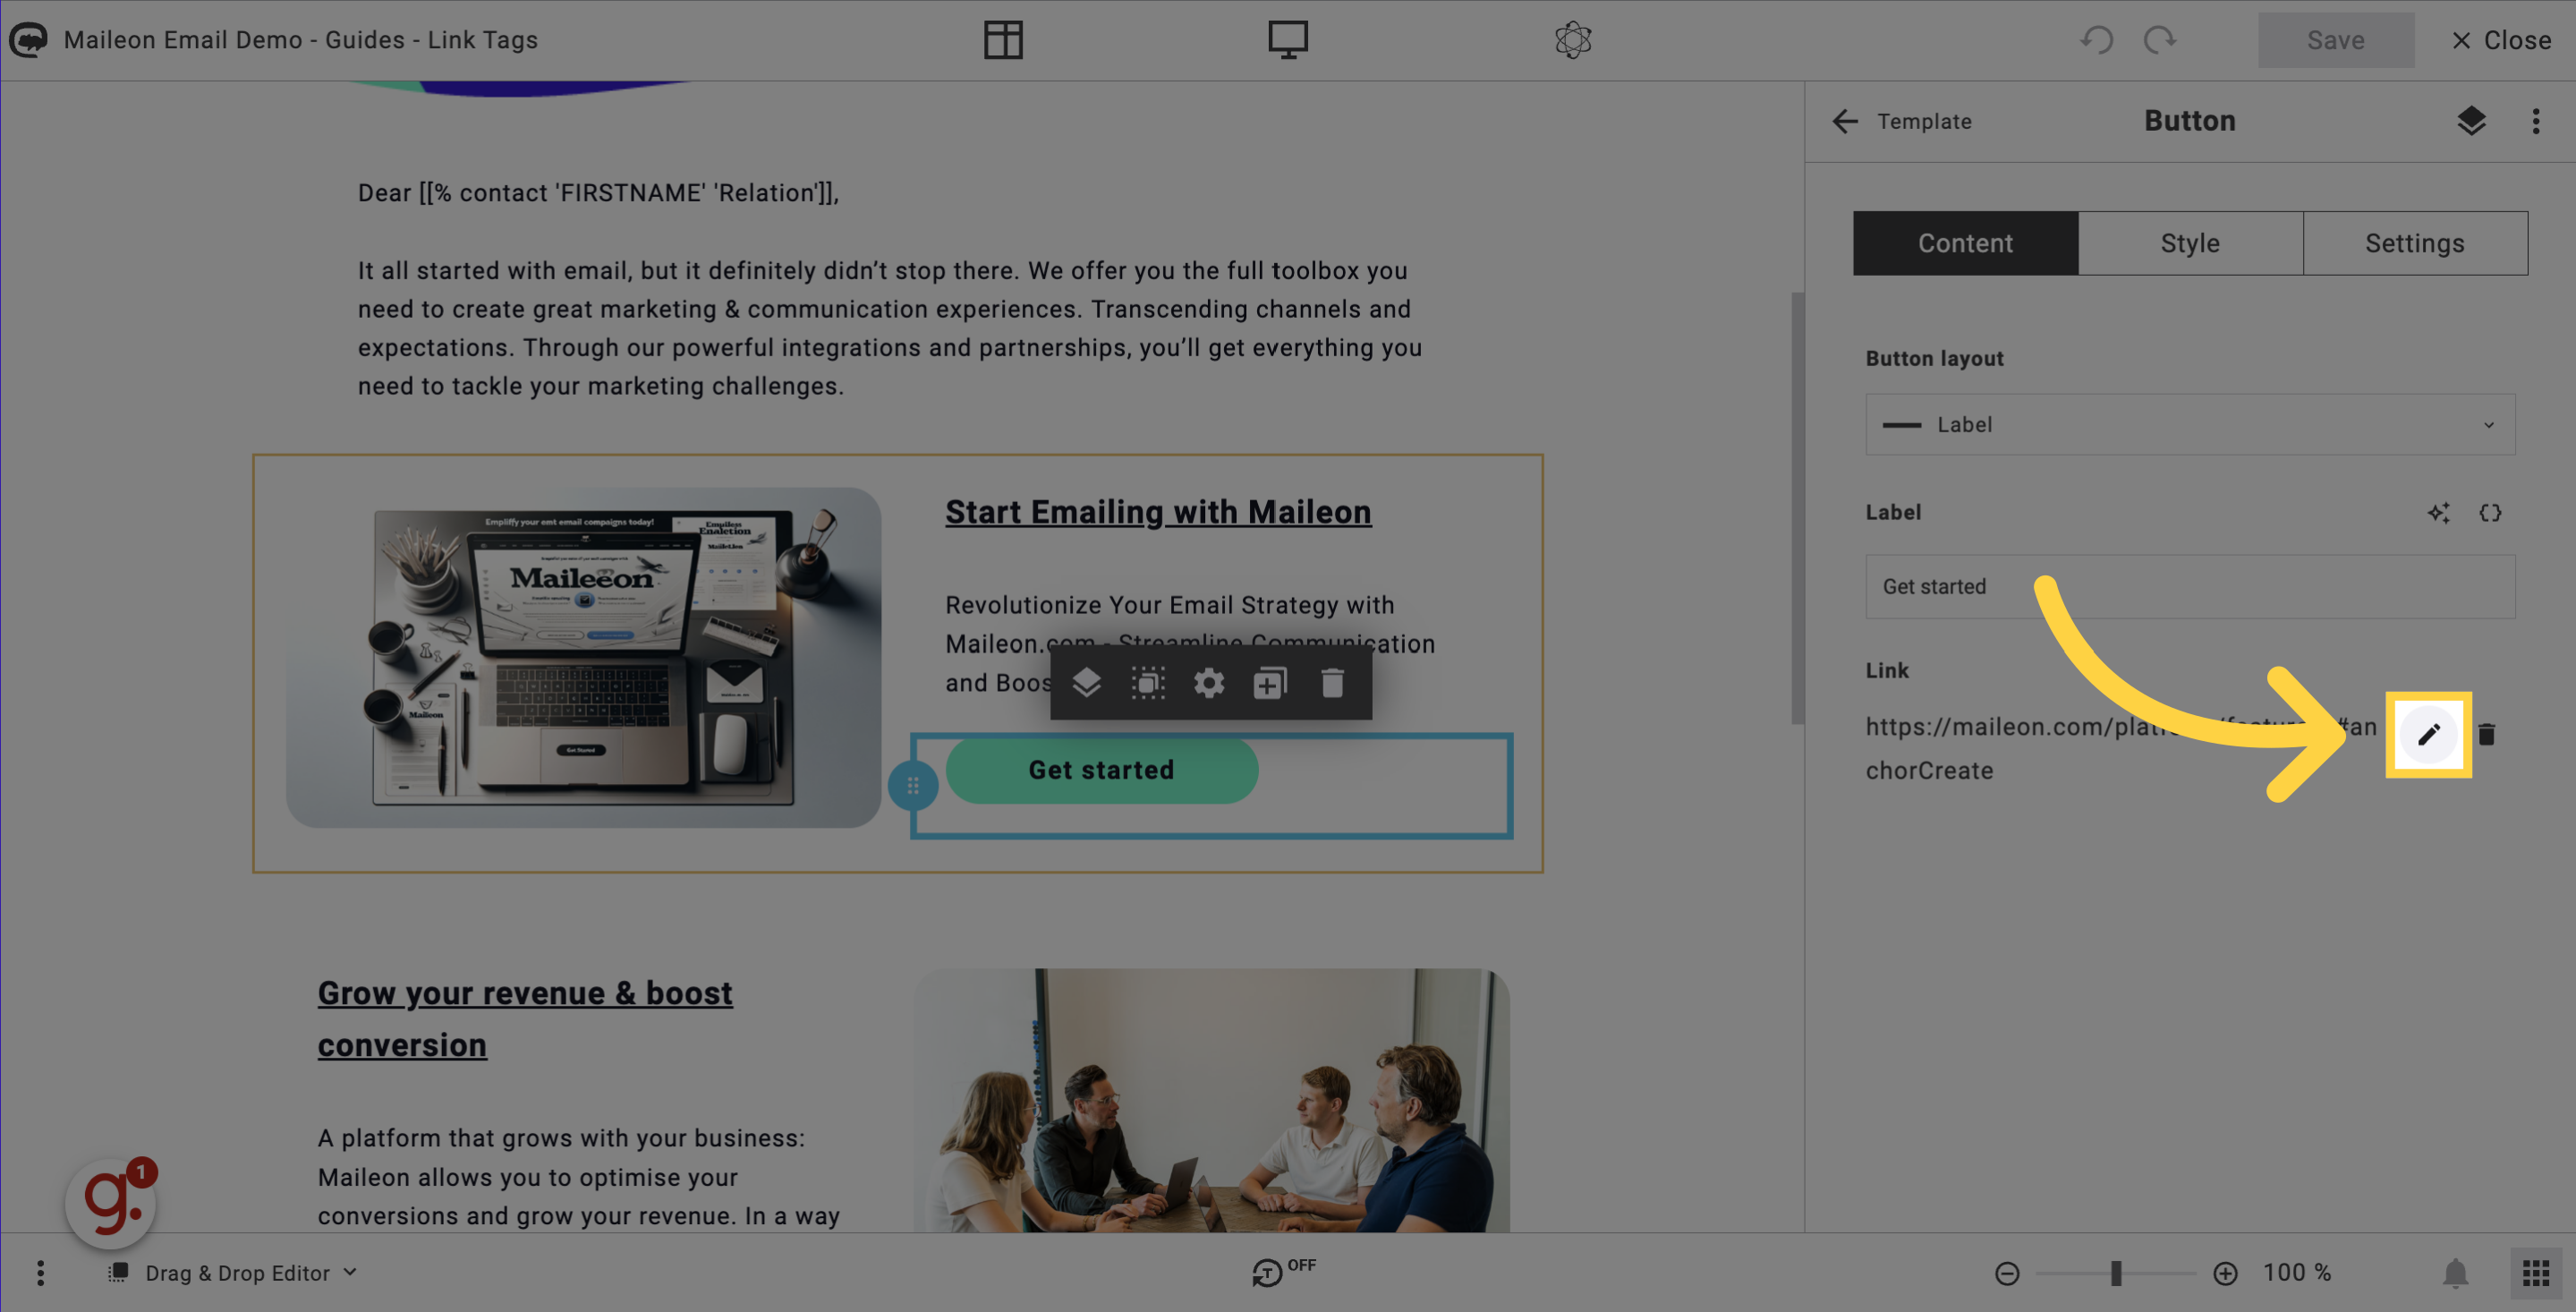
Select an element with a link to start with. In this case a button.

2. Edit the link
Click on the edit link icon.
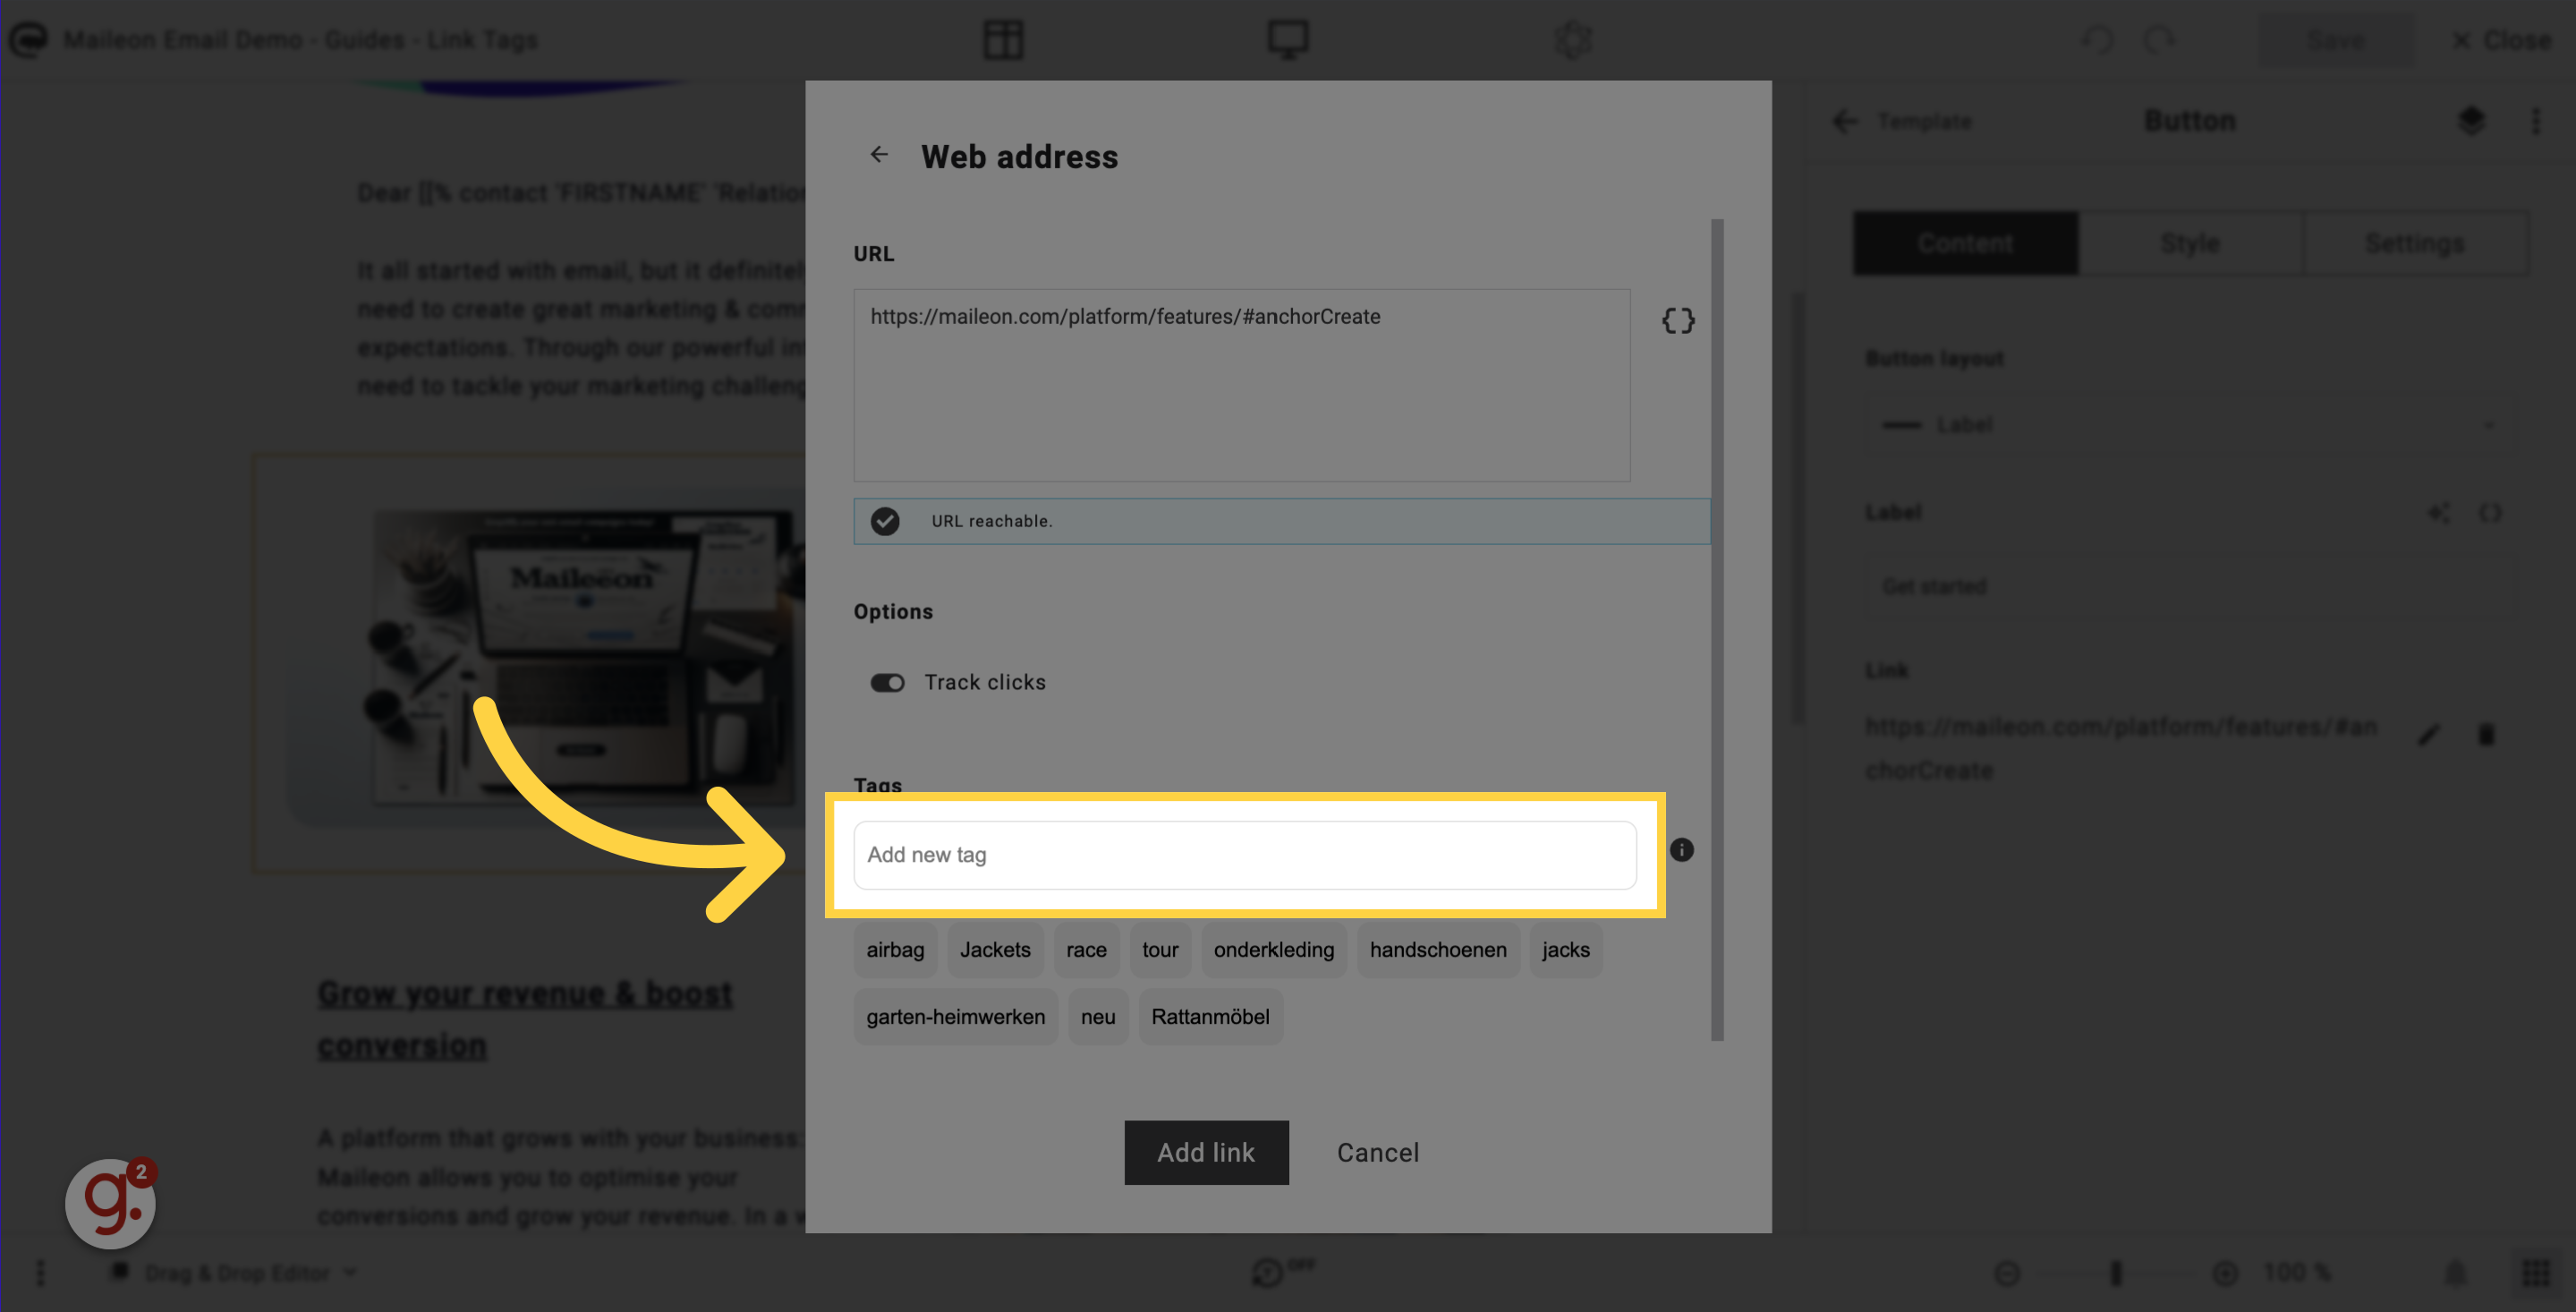
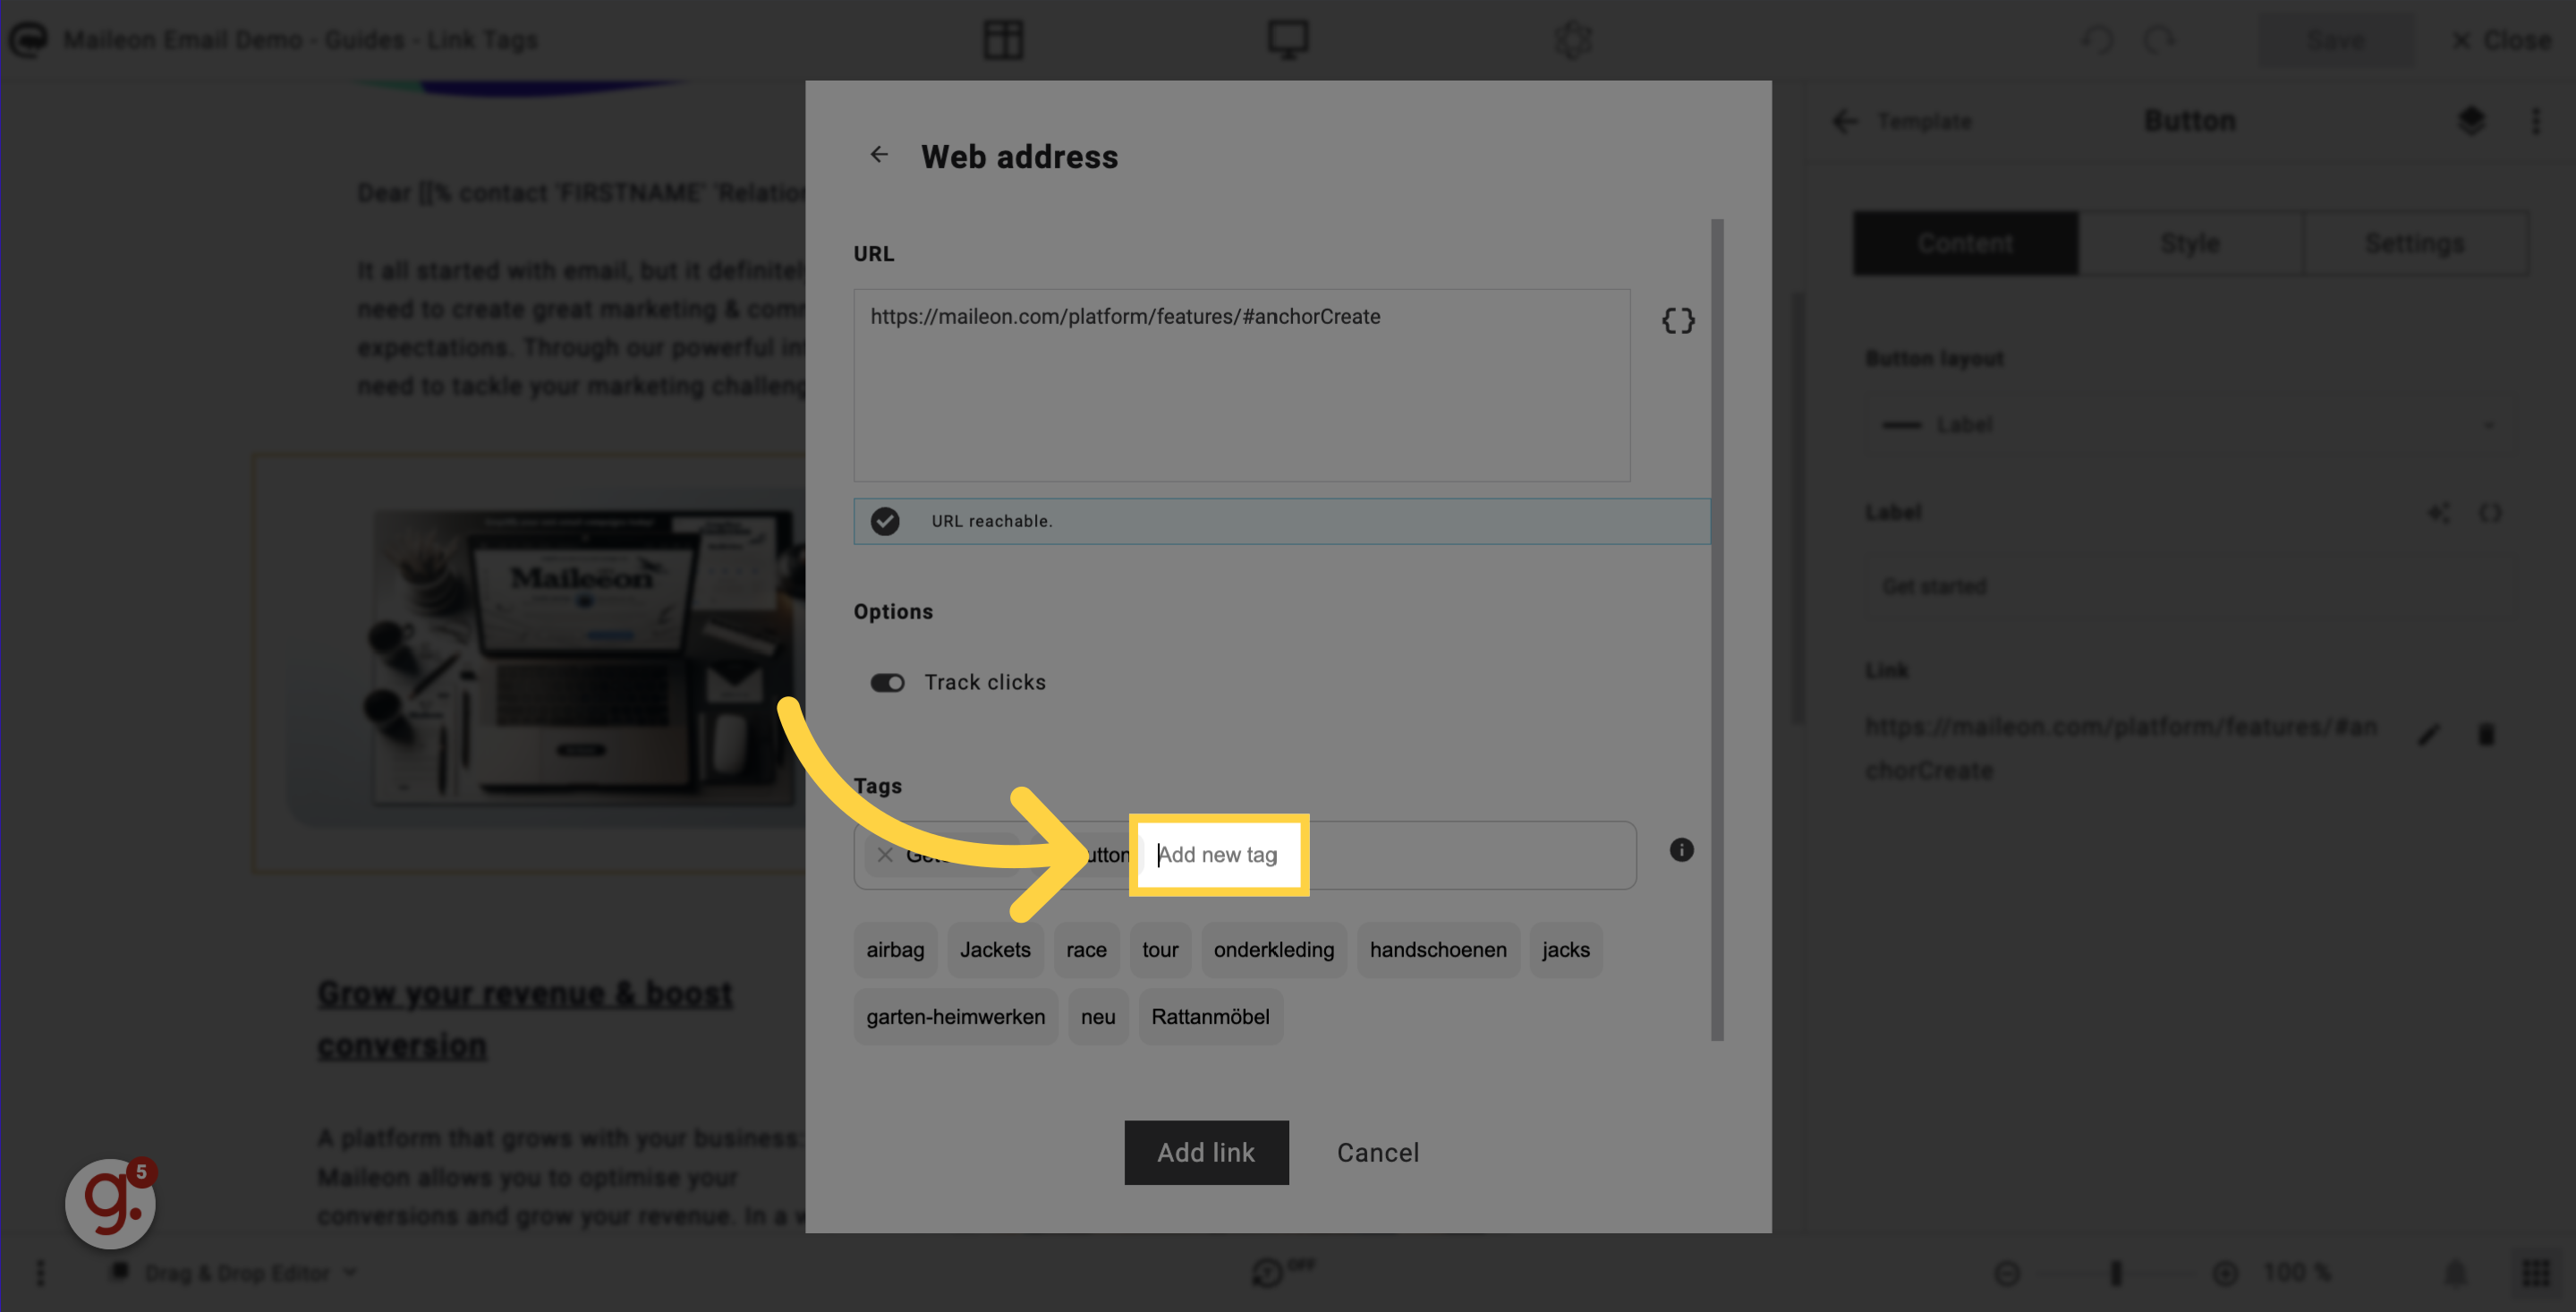
3. Click "Add new tag"
Click on the "Add new tag" button to create a new tag. You can add as many tags as you want. And you can re-use any tag you created by selecting one of the tags just underneath the 'Add new tag' field. Note: Make sure 'Track Links' option is enabled to be able to add tags.
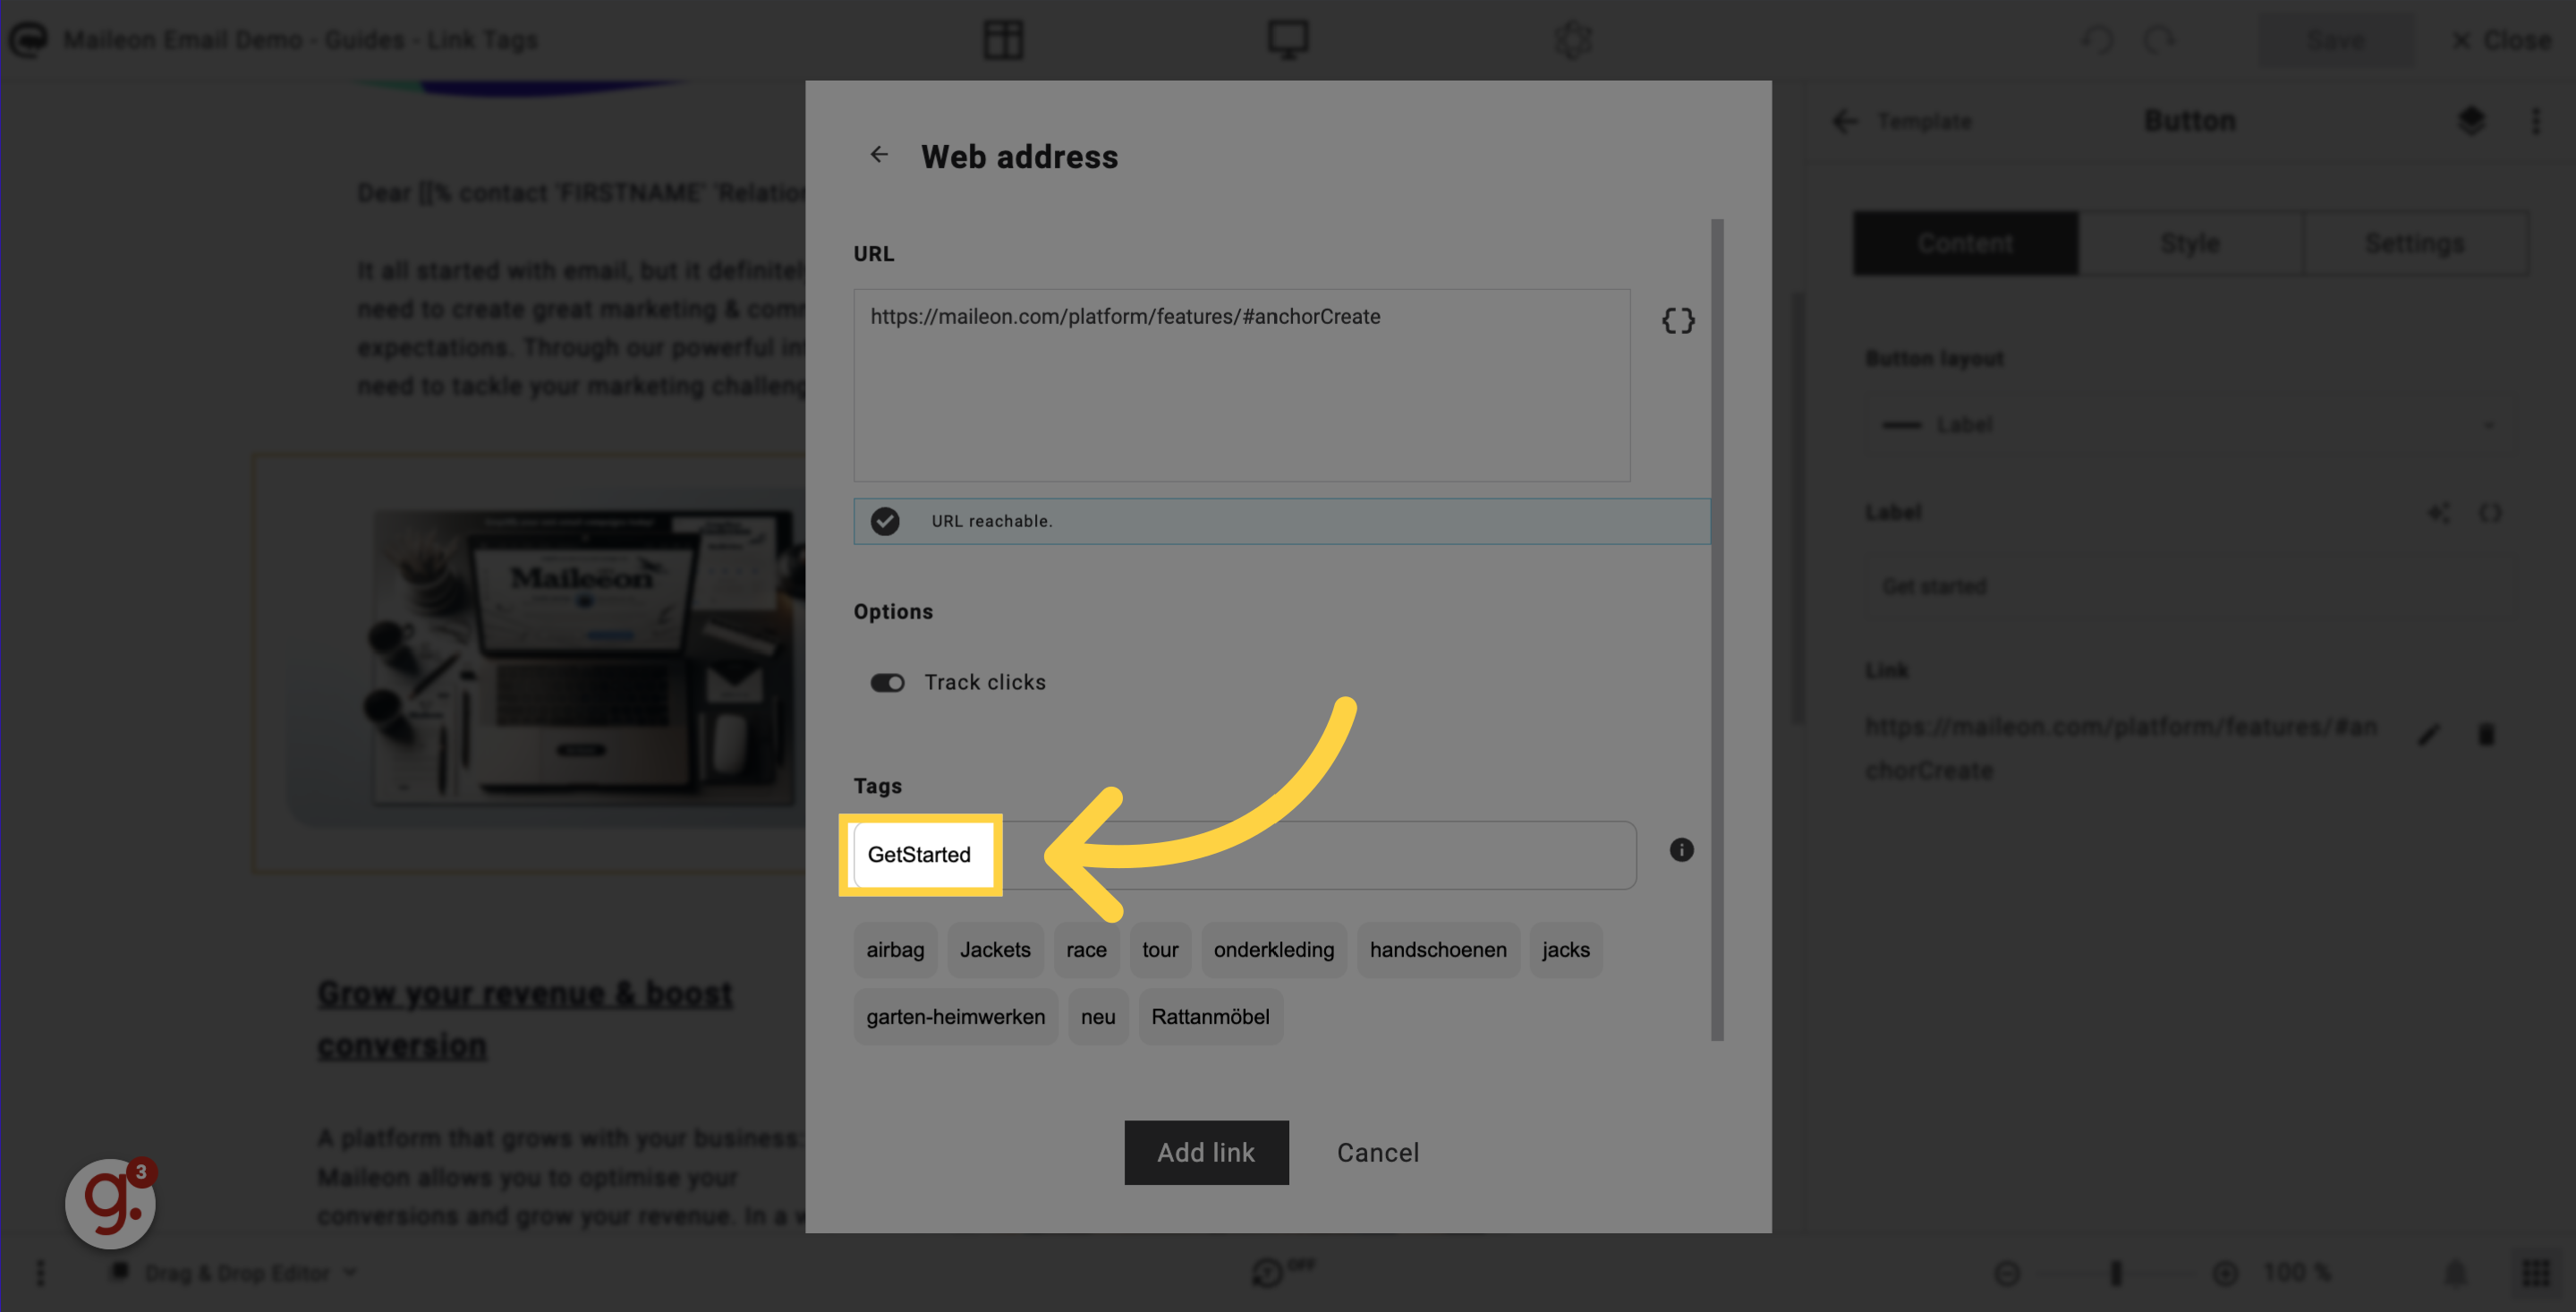
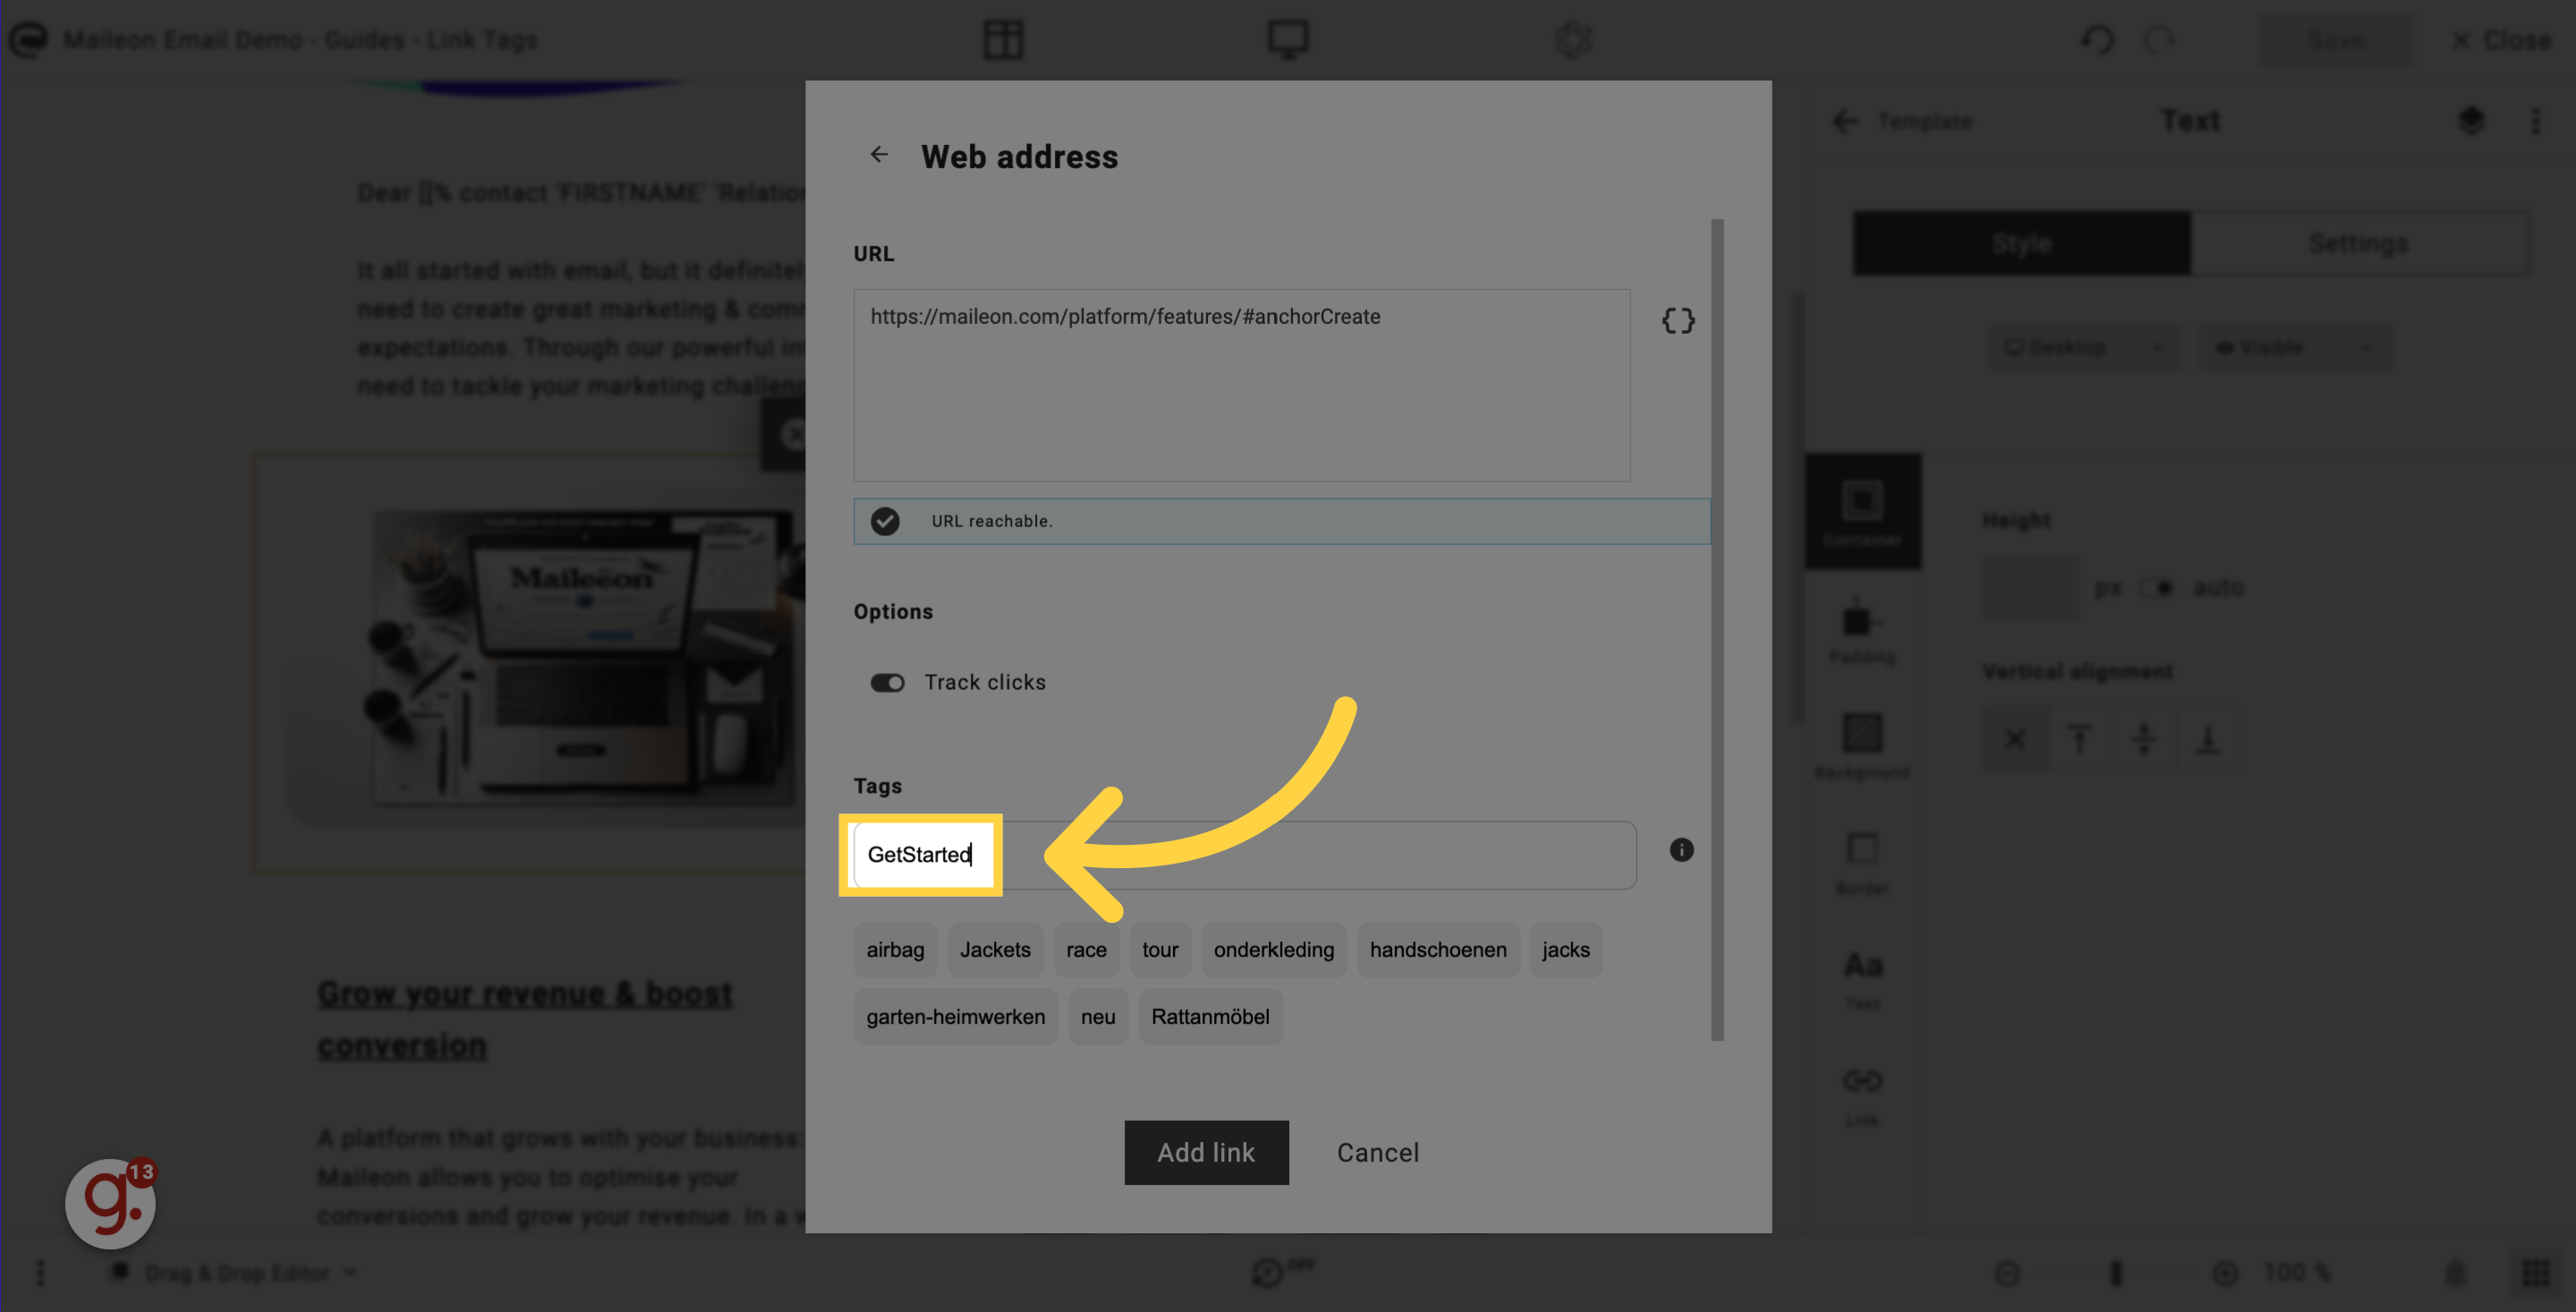
4. Name your tag
Name your tag. In this case we've used the CTA text "GetStarted" in the specified field.
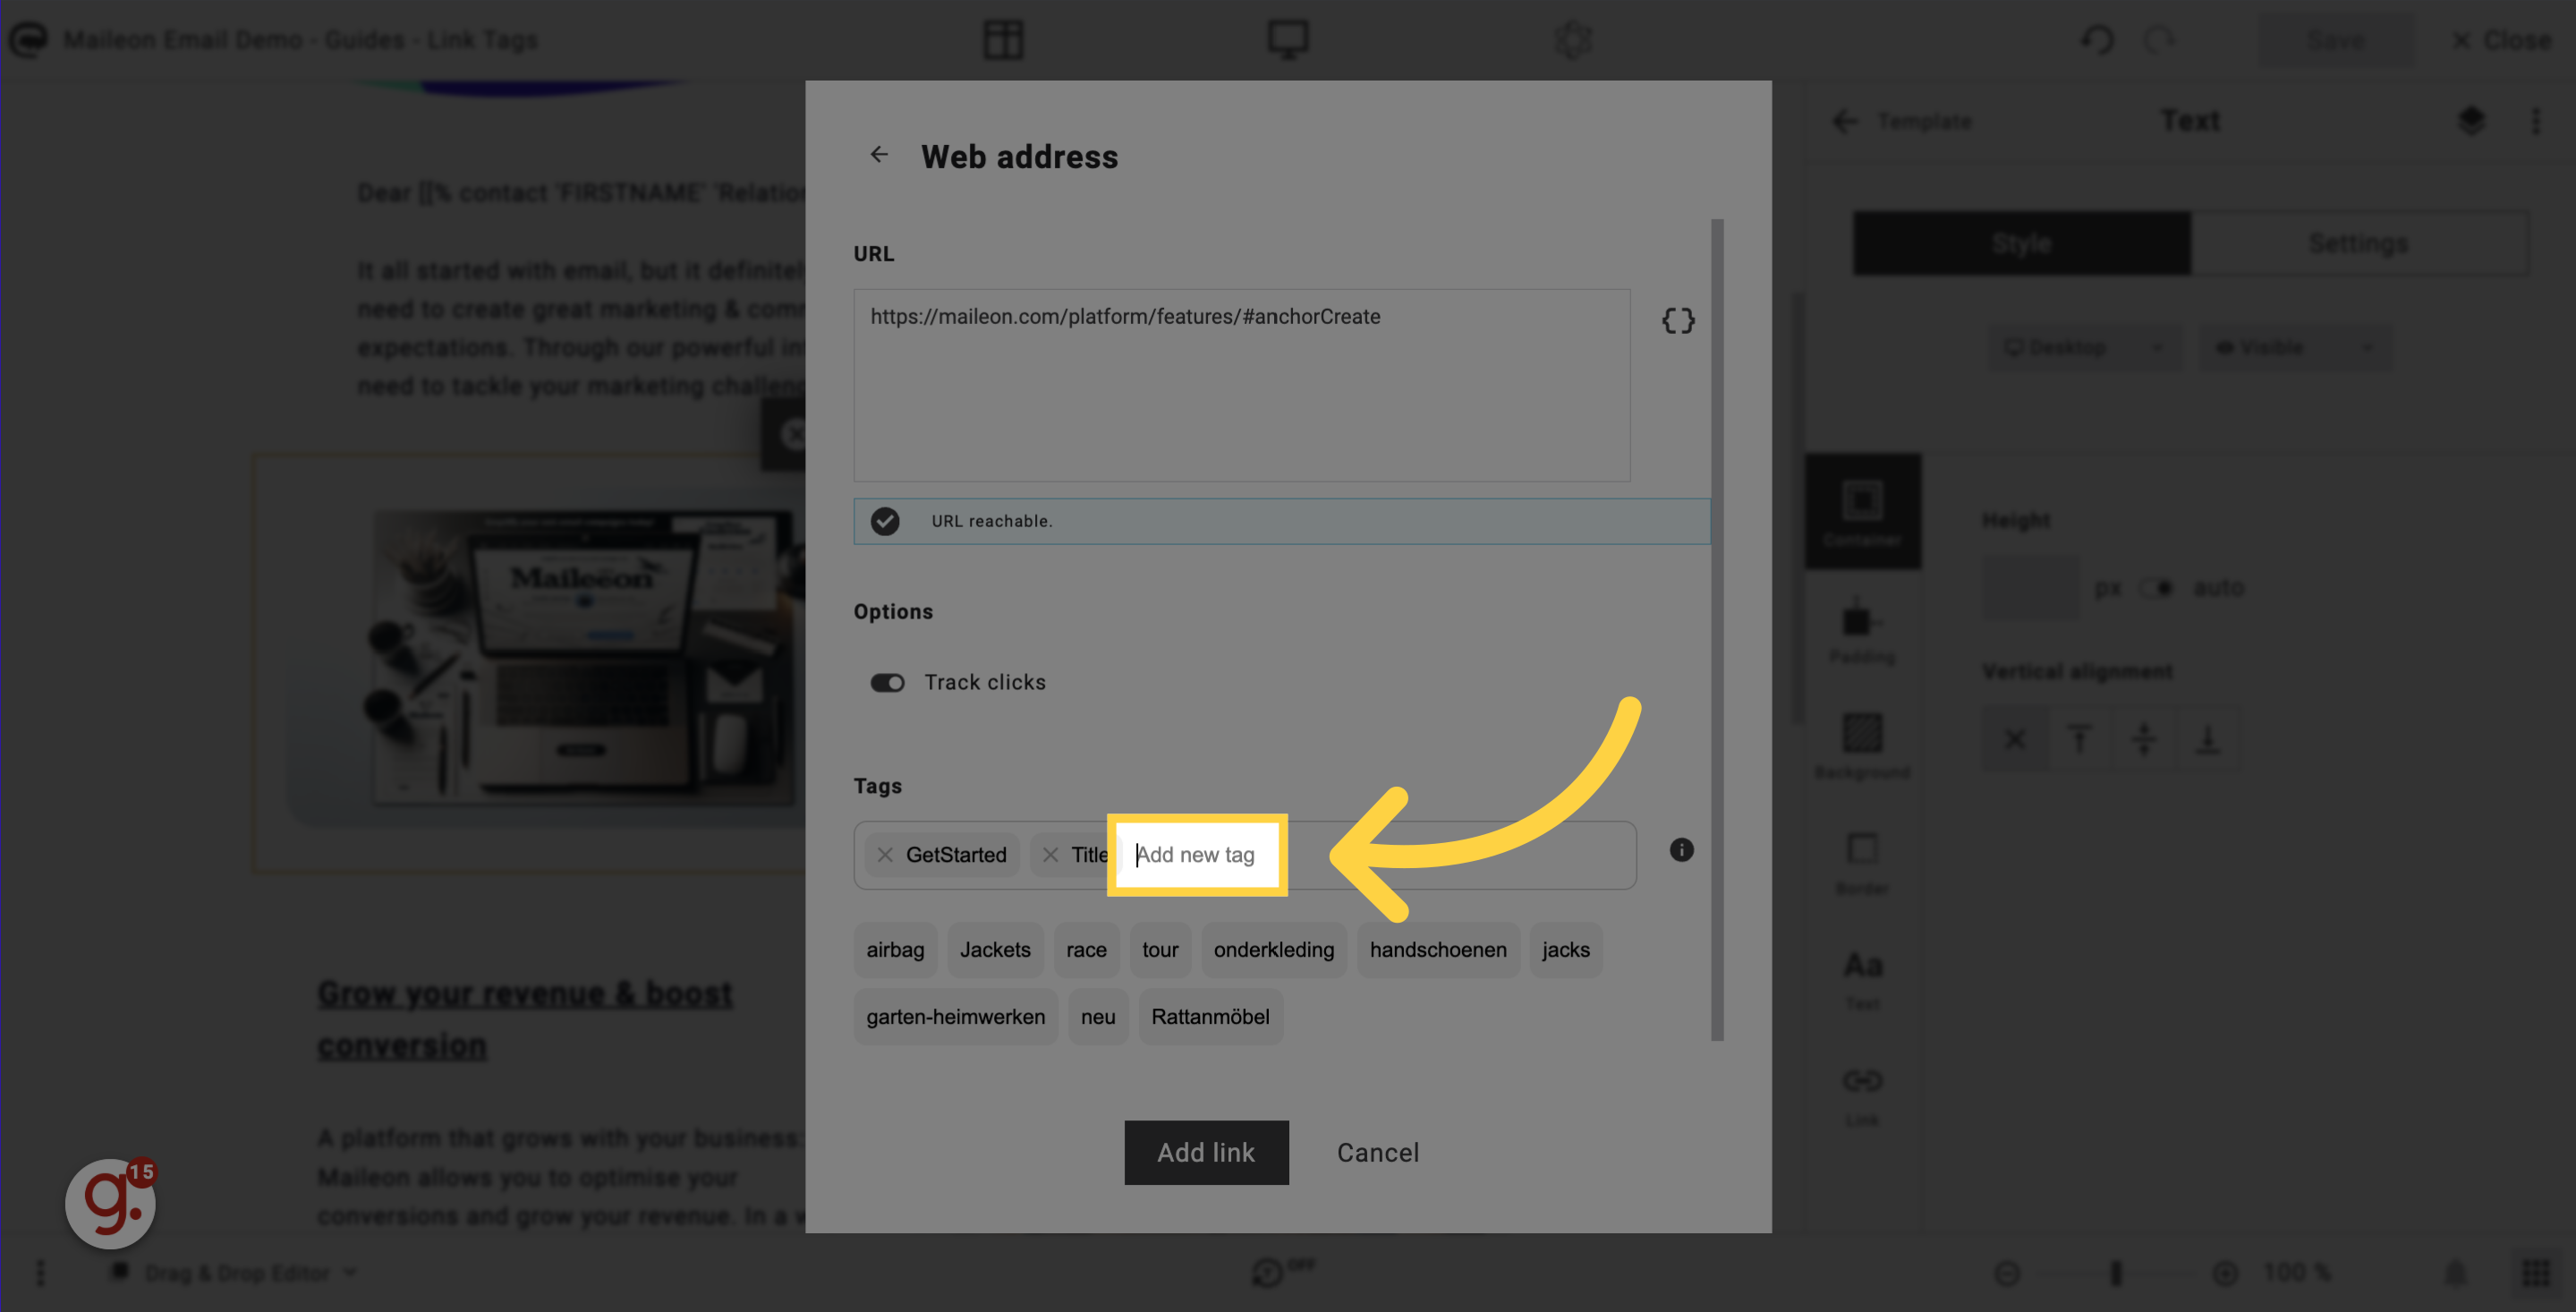
5. Add another tag, if needed
As mentioned, you're able to add multiple tags. For example, in this case we have one tag for the entire block, and a specific tag for each element, in this case a button.
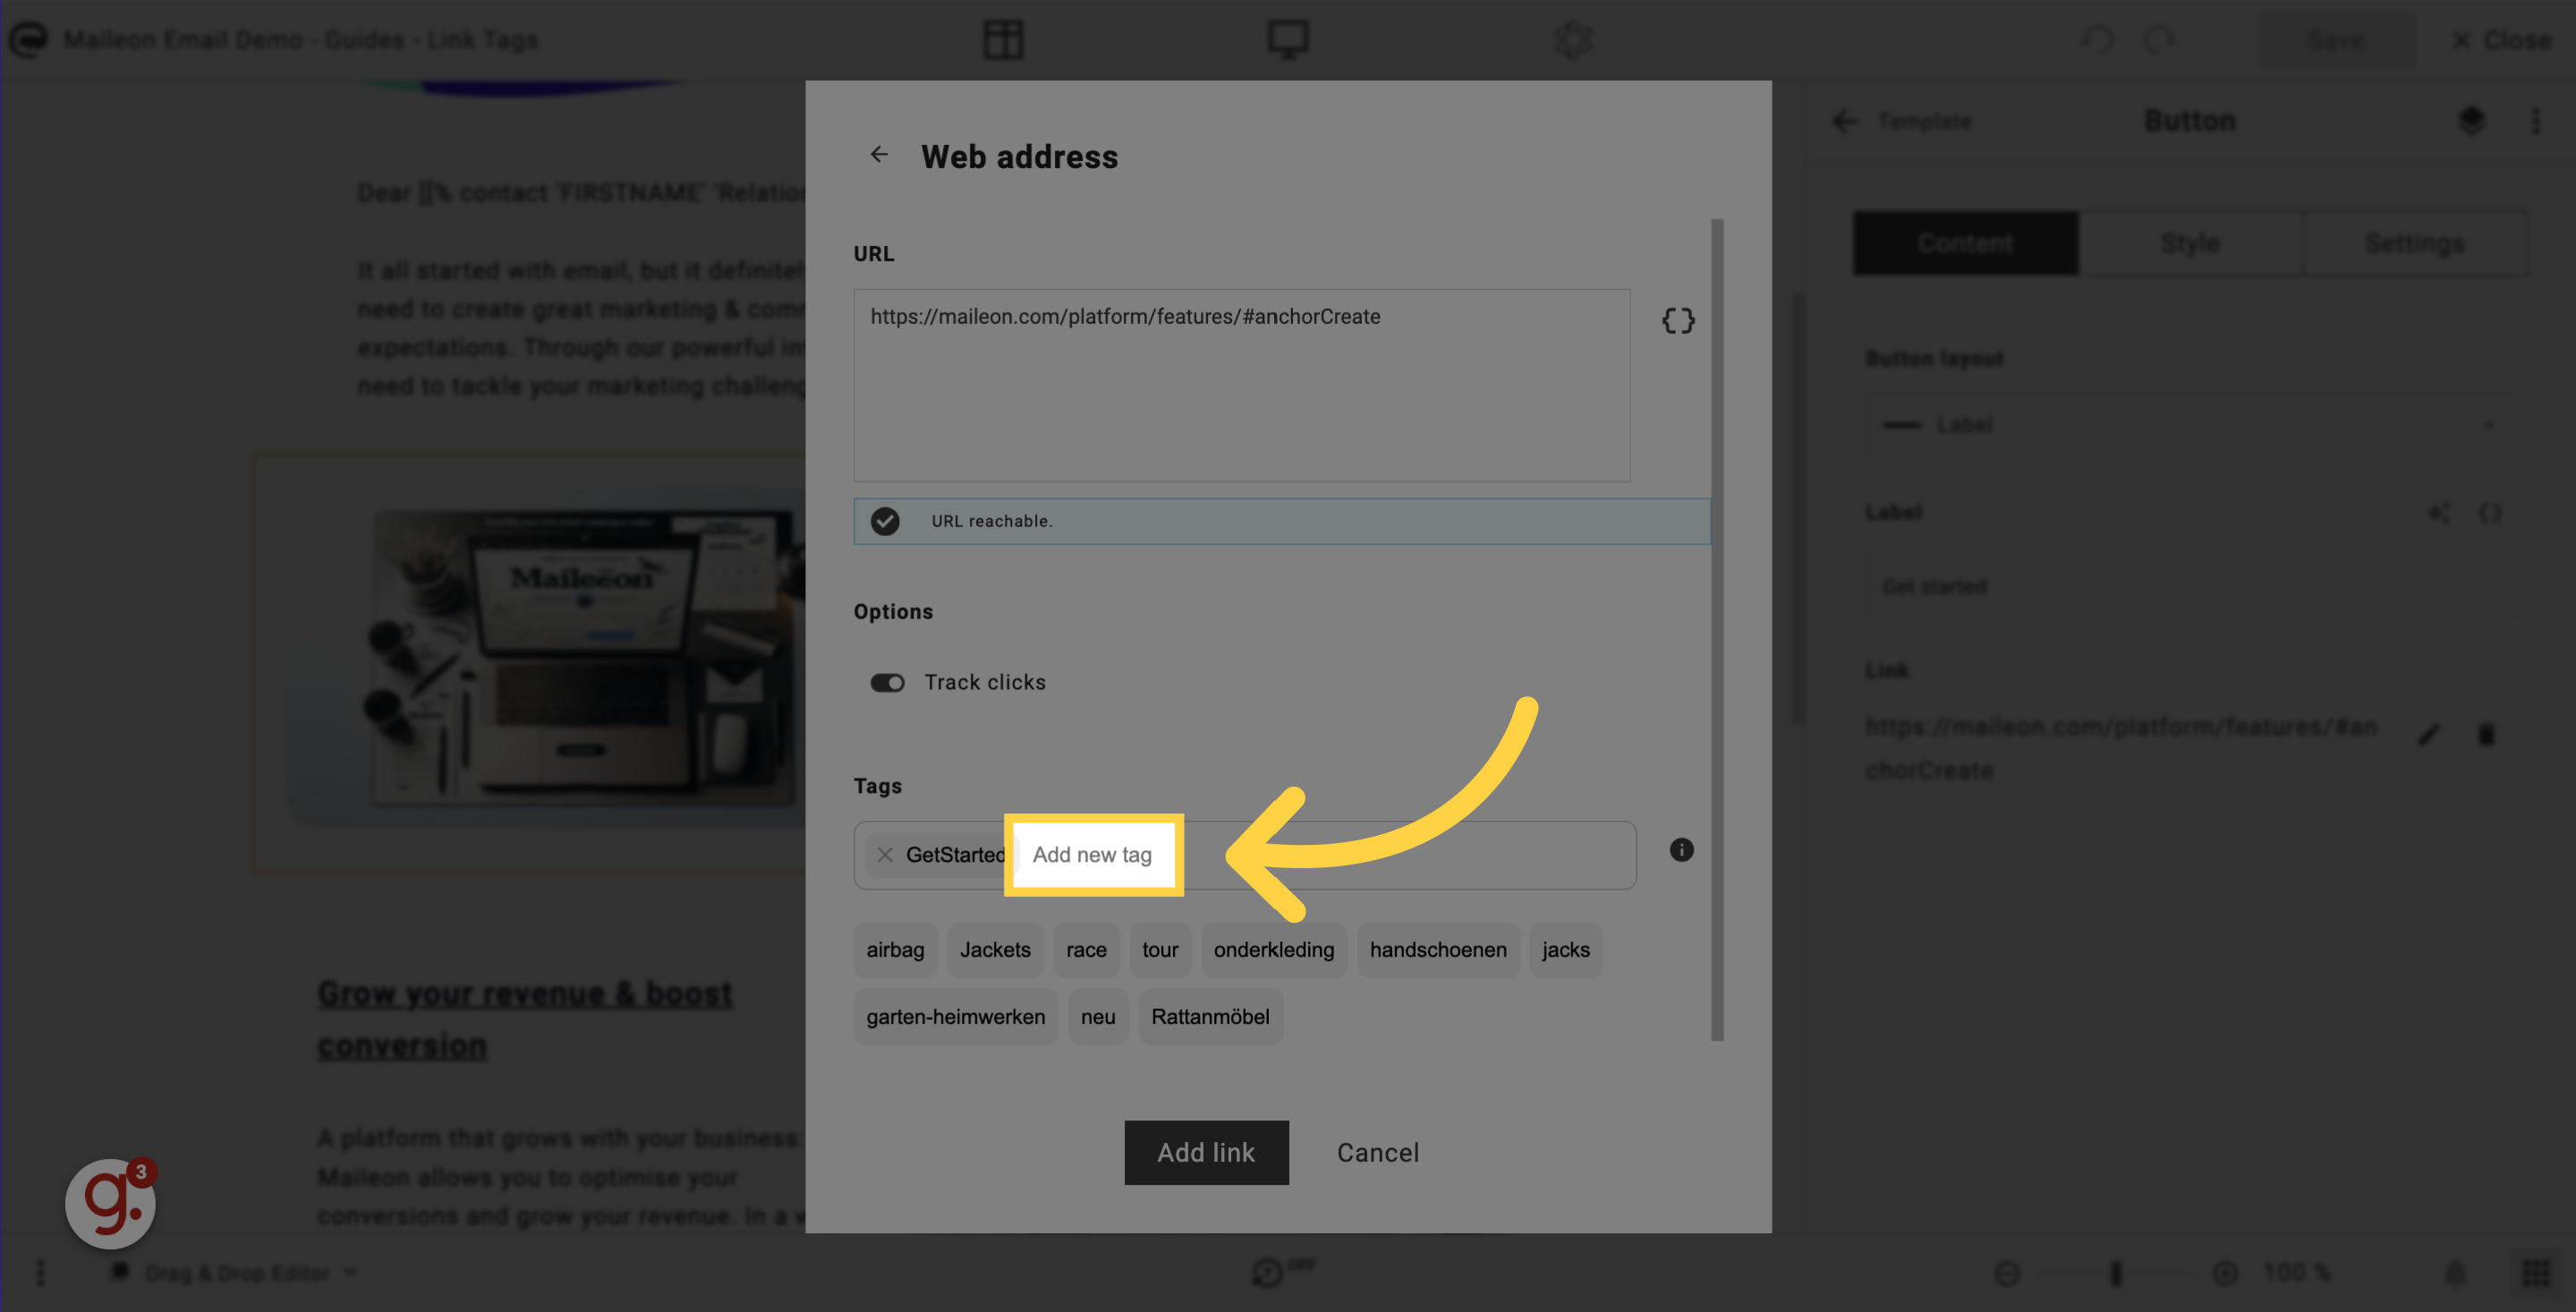
6. Adding the button tag (example)
Adding the button tag.
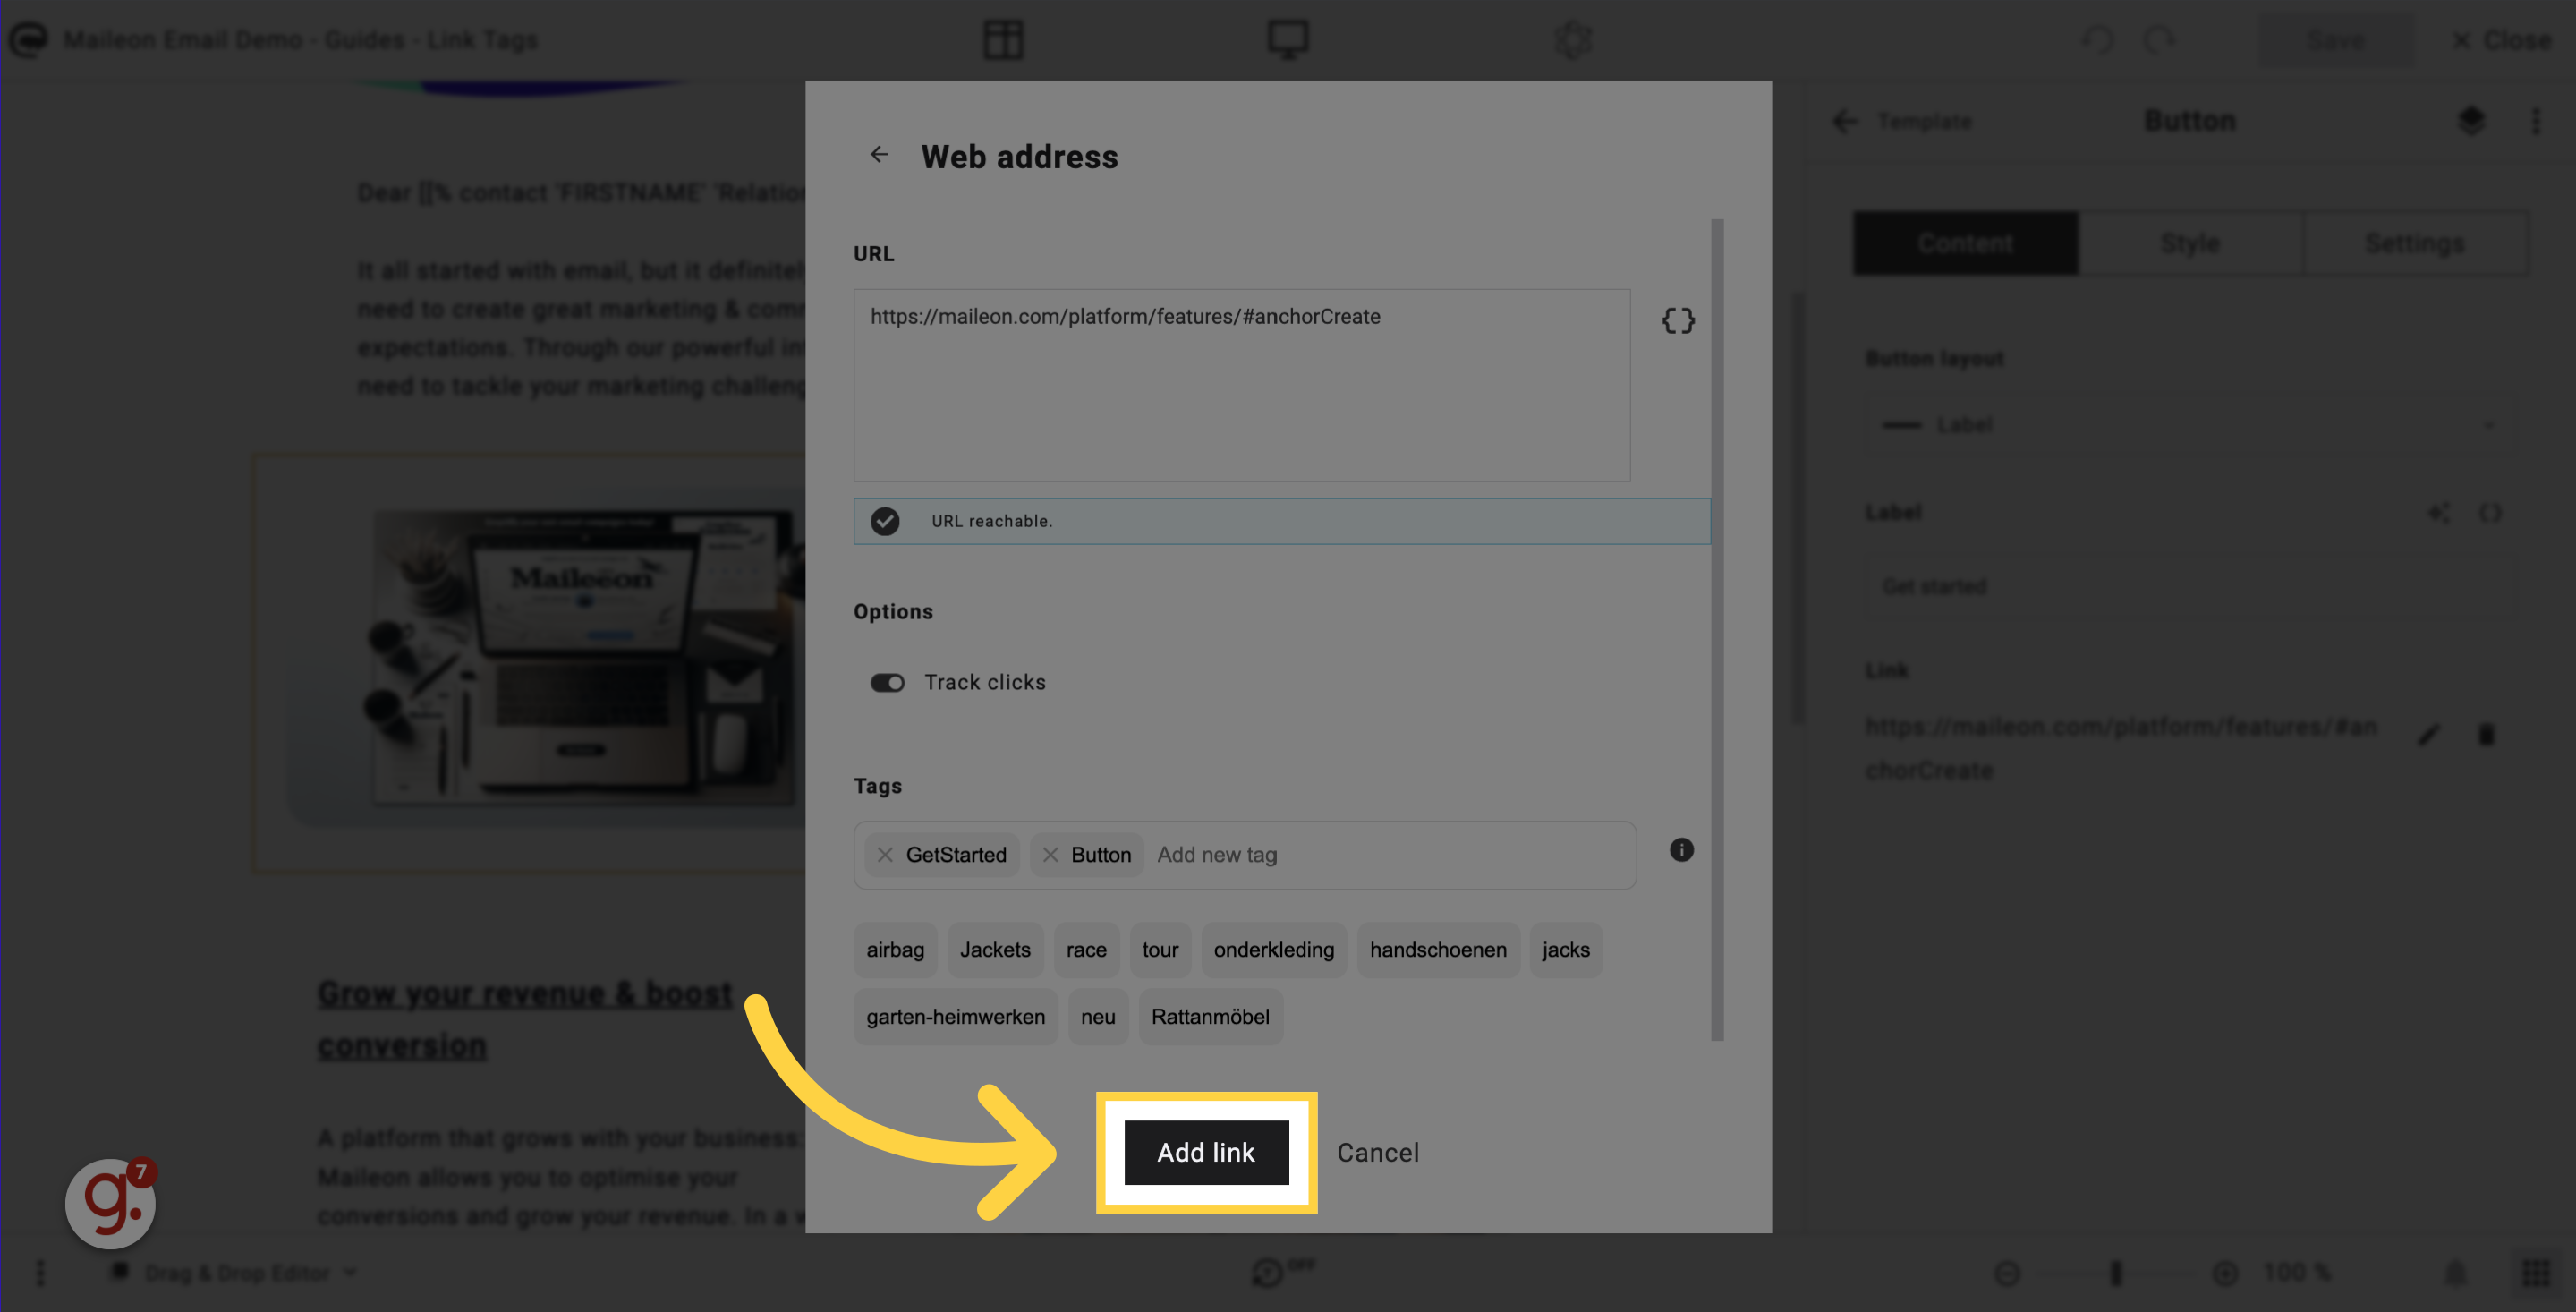
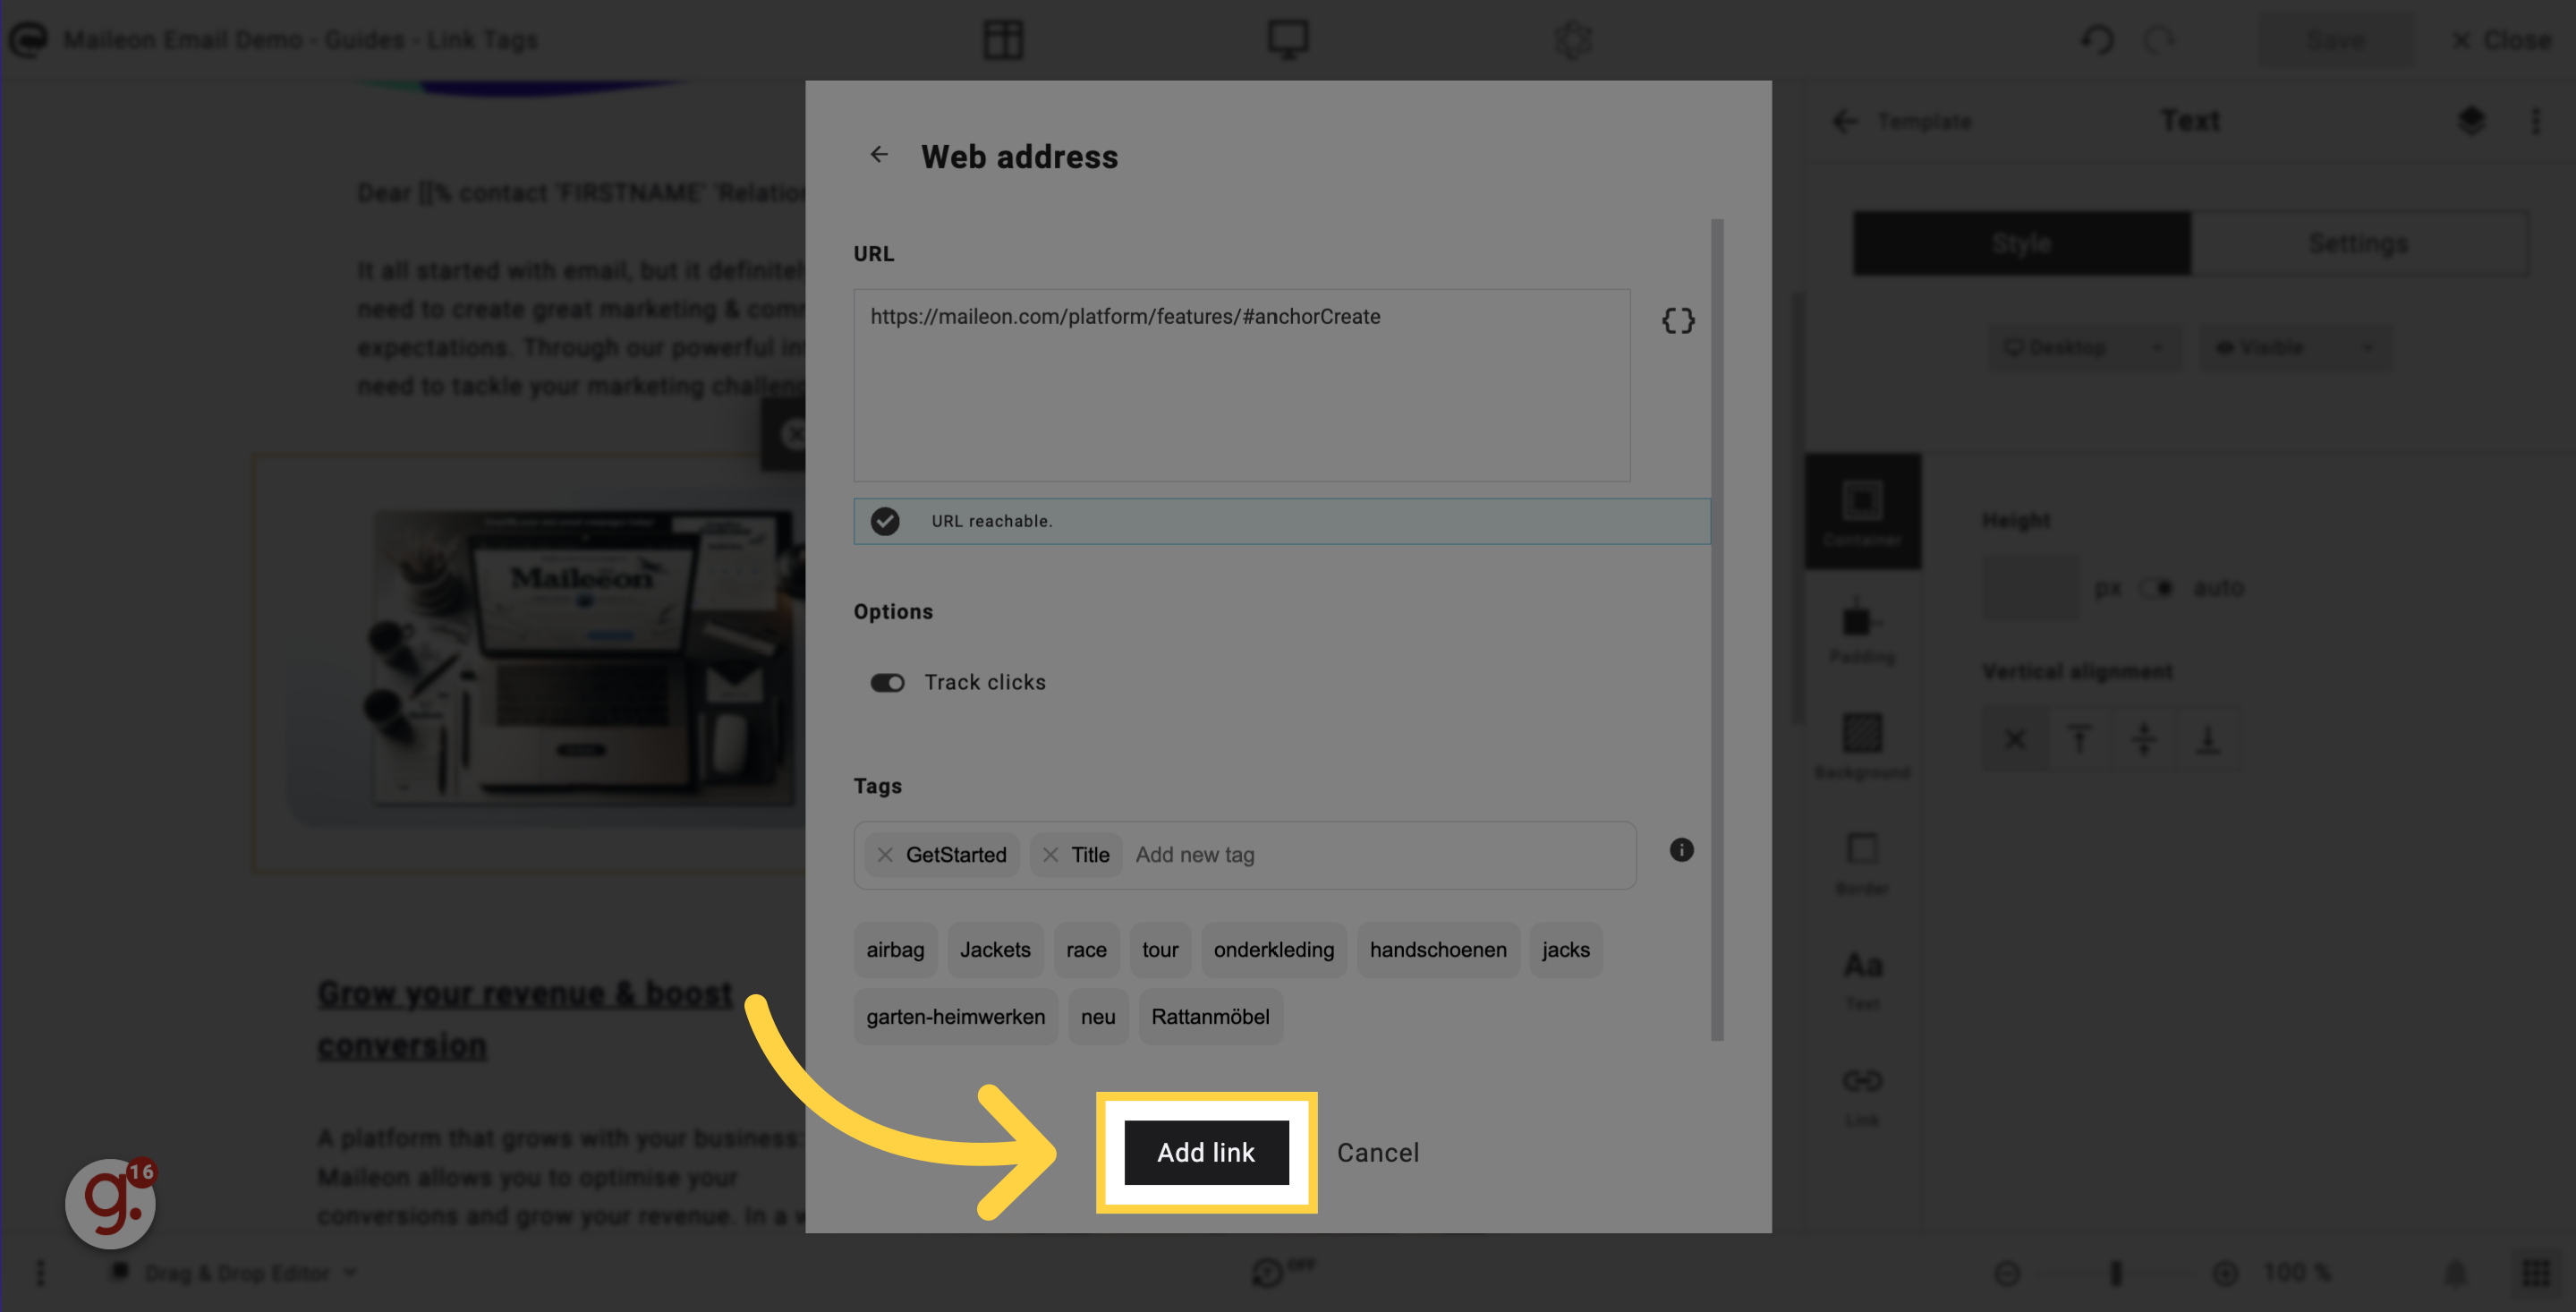
7. Click "Add link" to save
Click on the "Add link" button to save your tags and link settings.
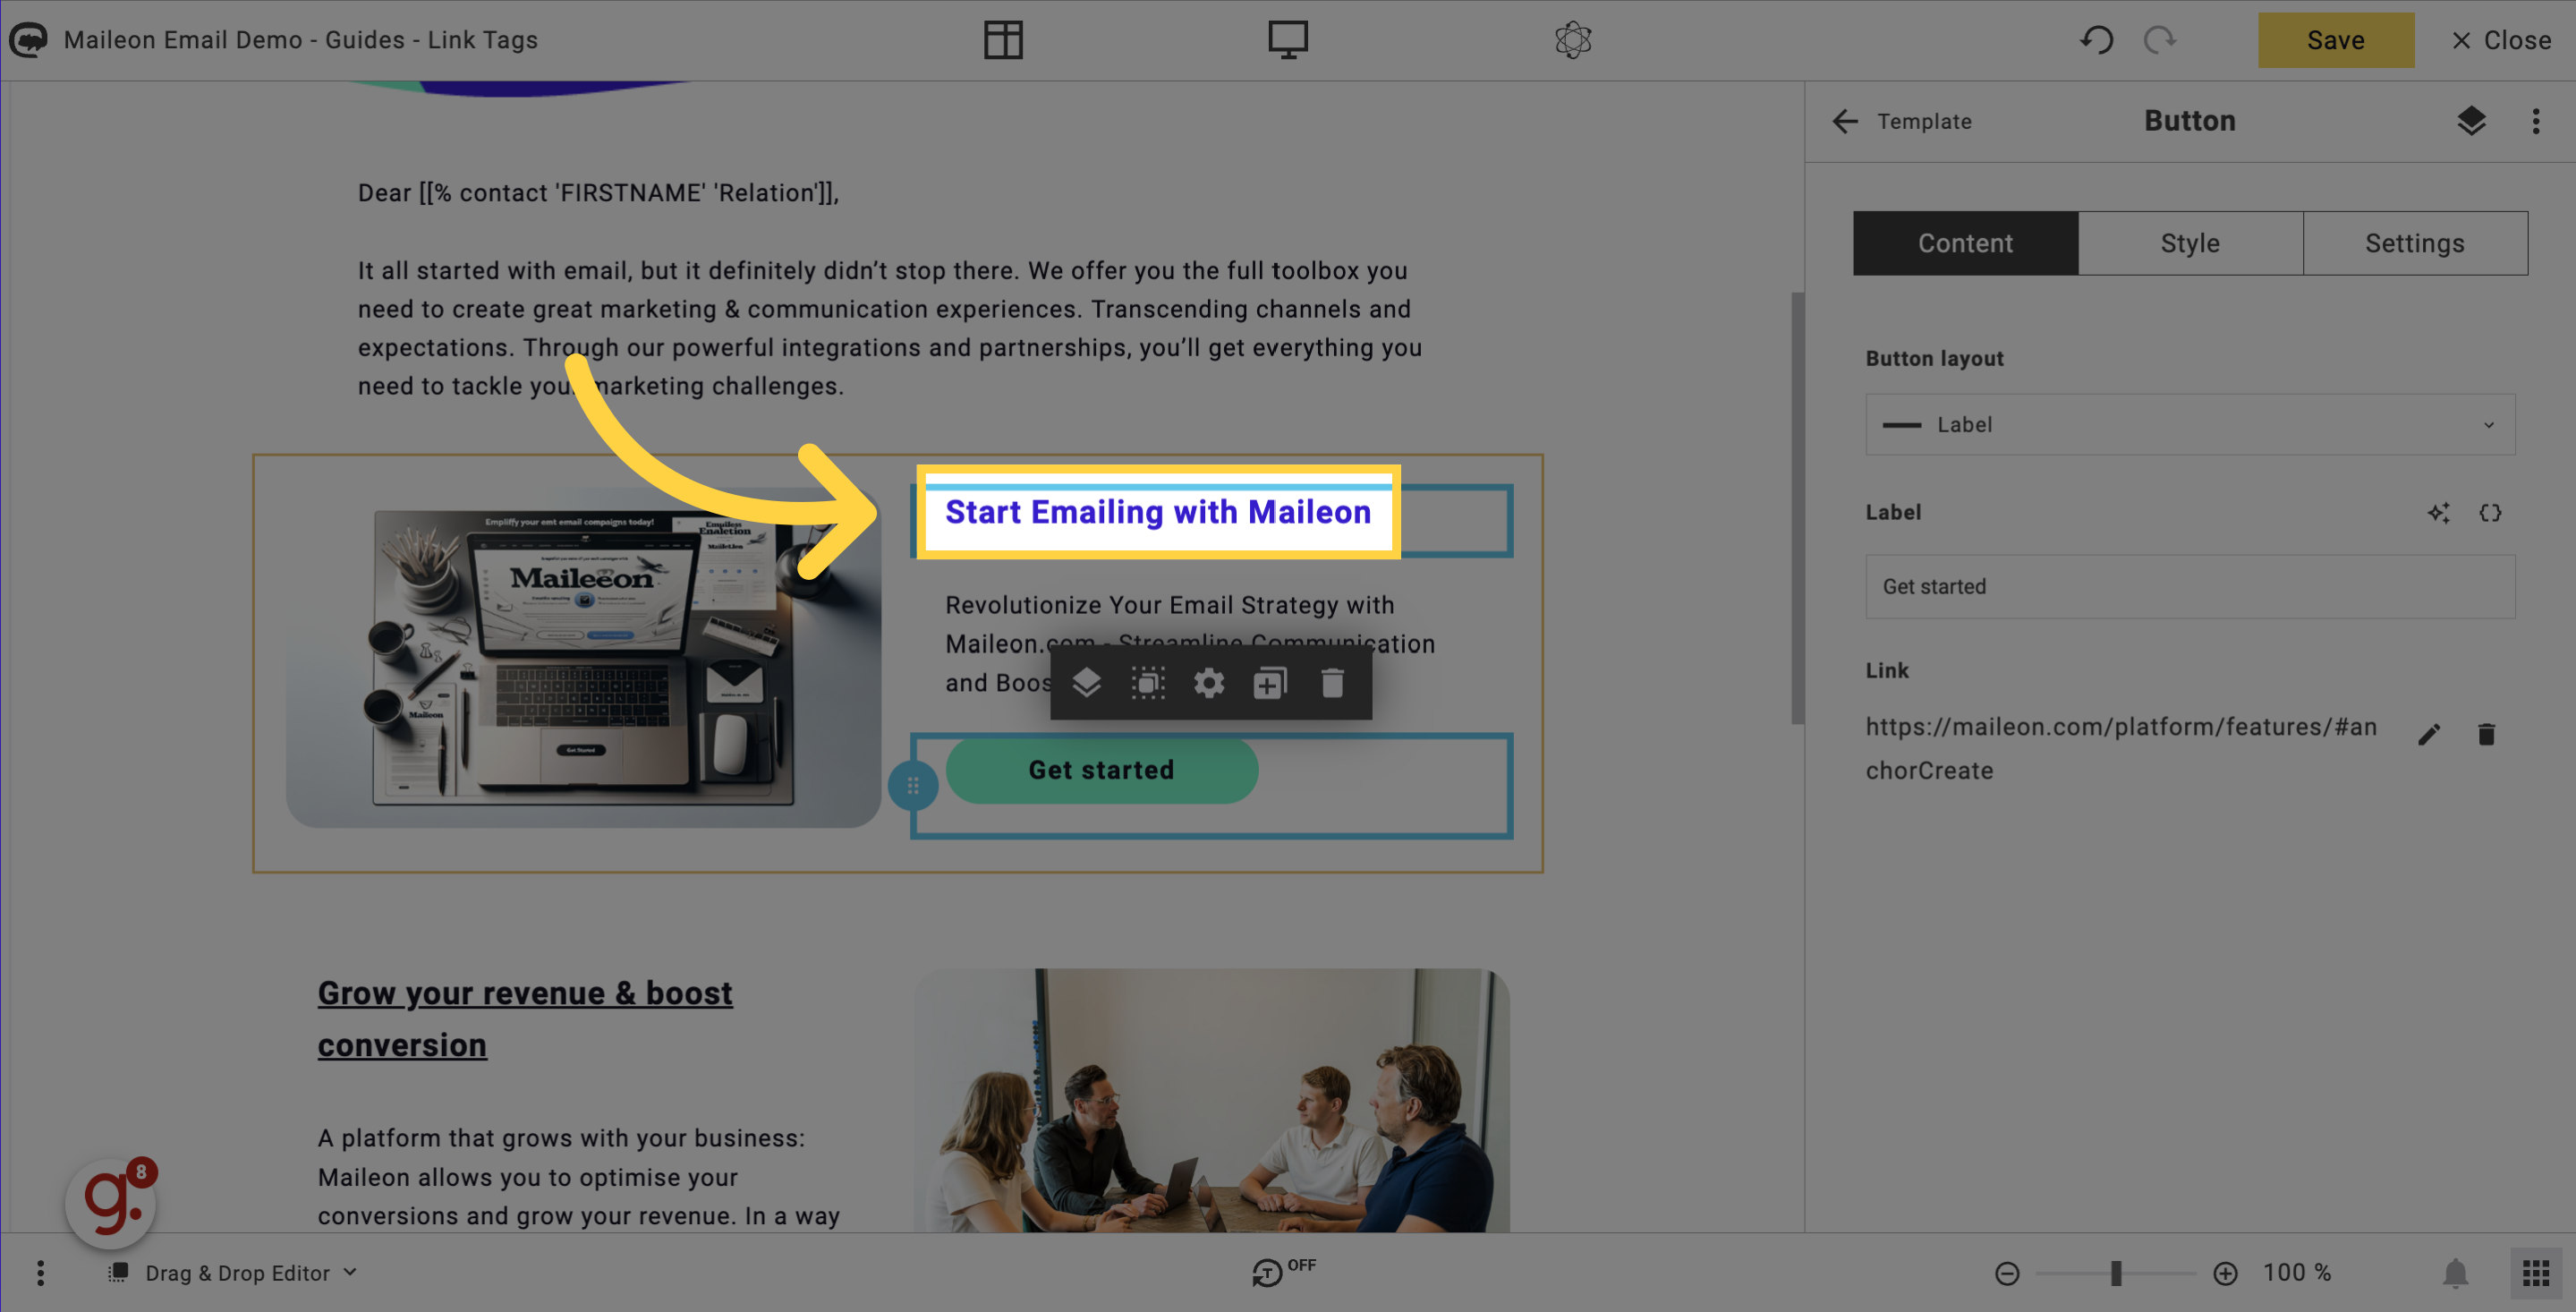
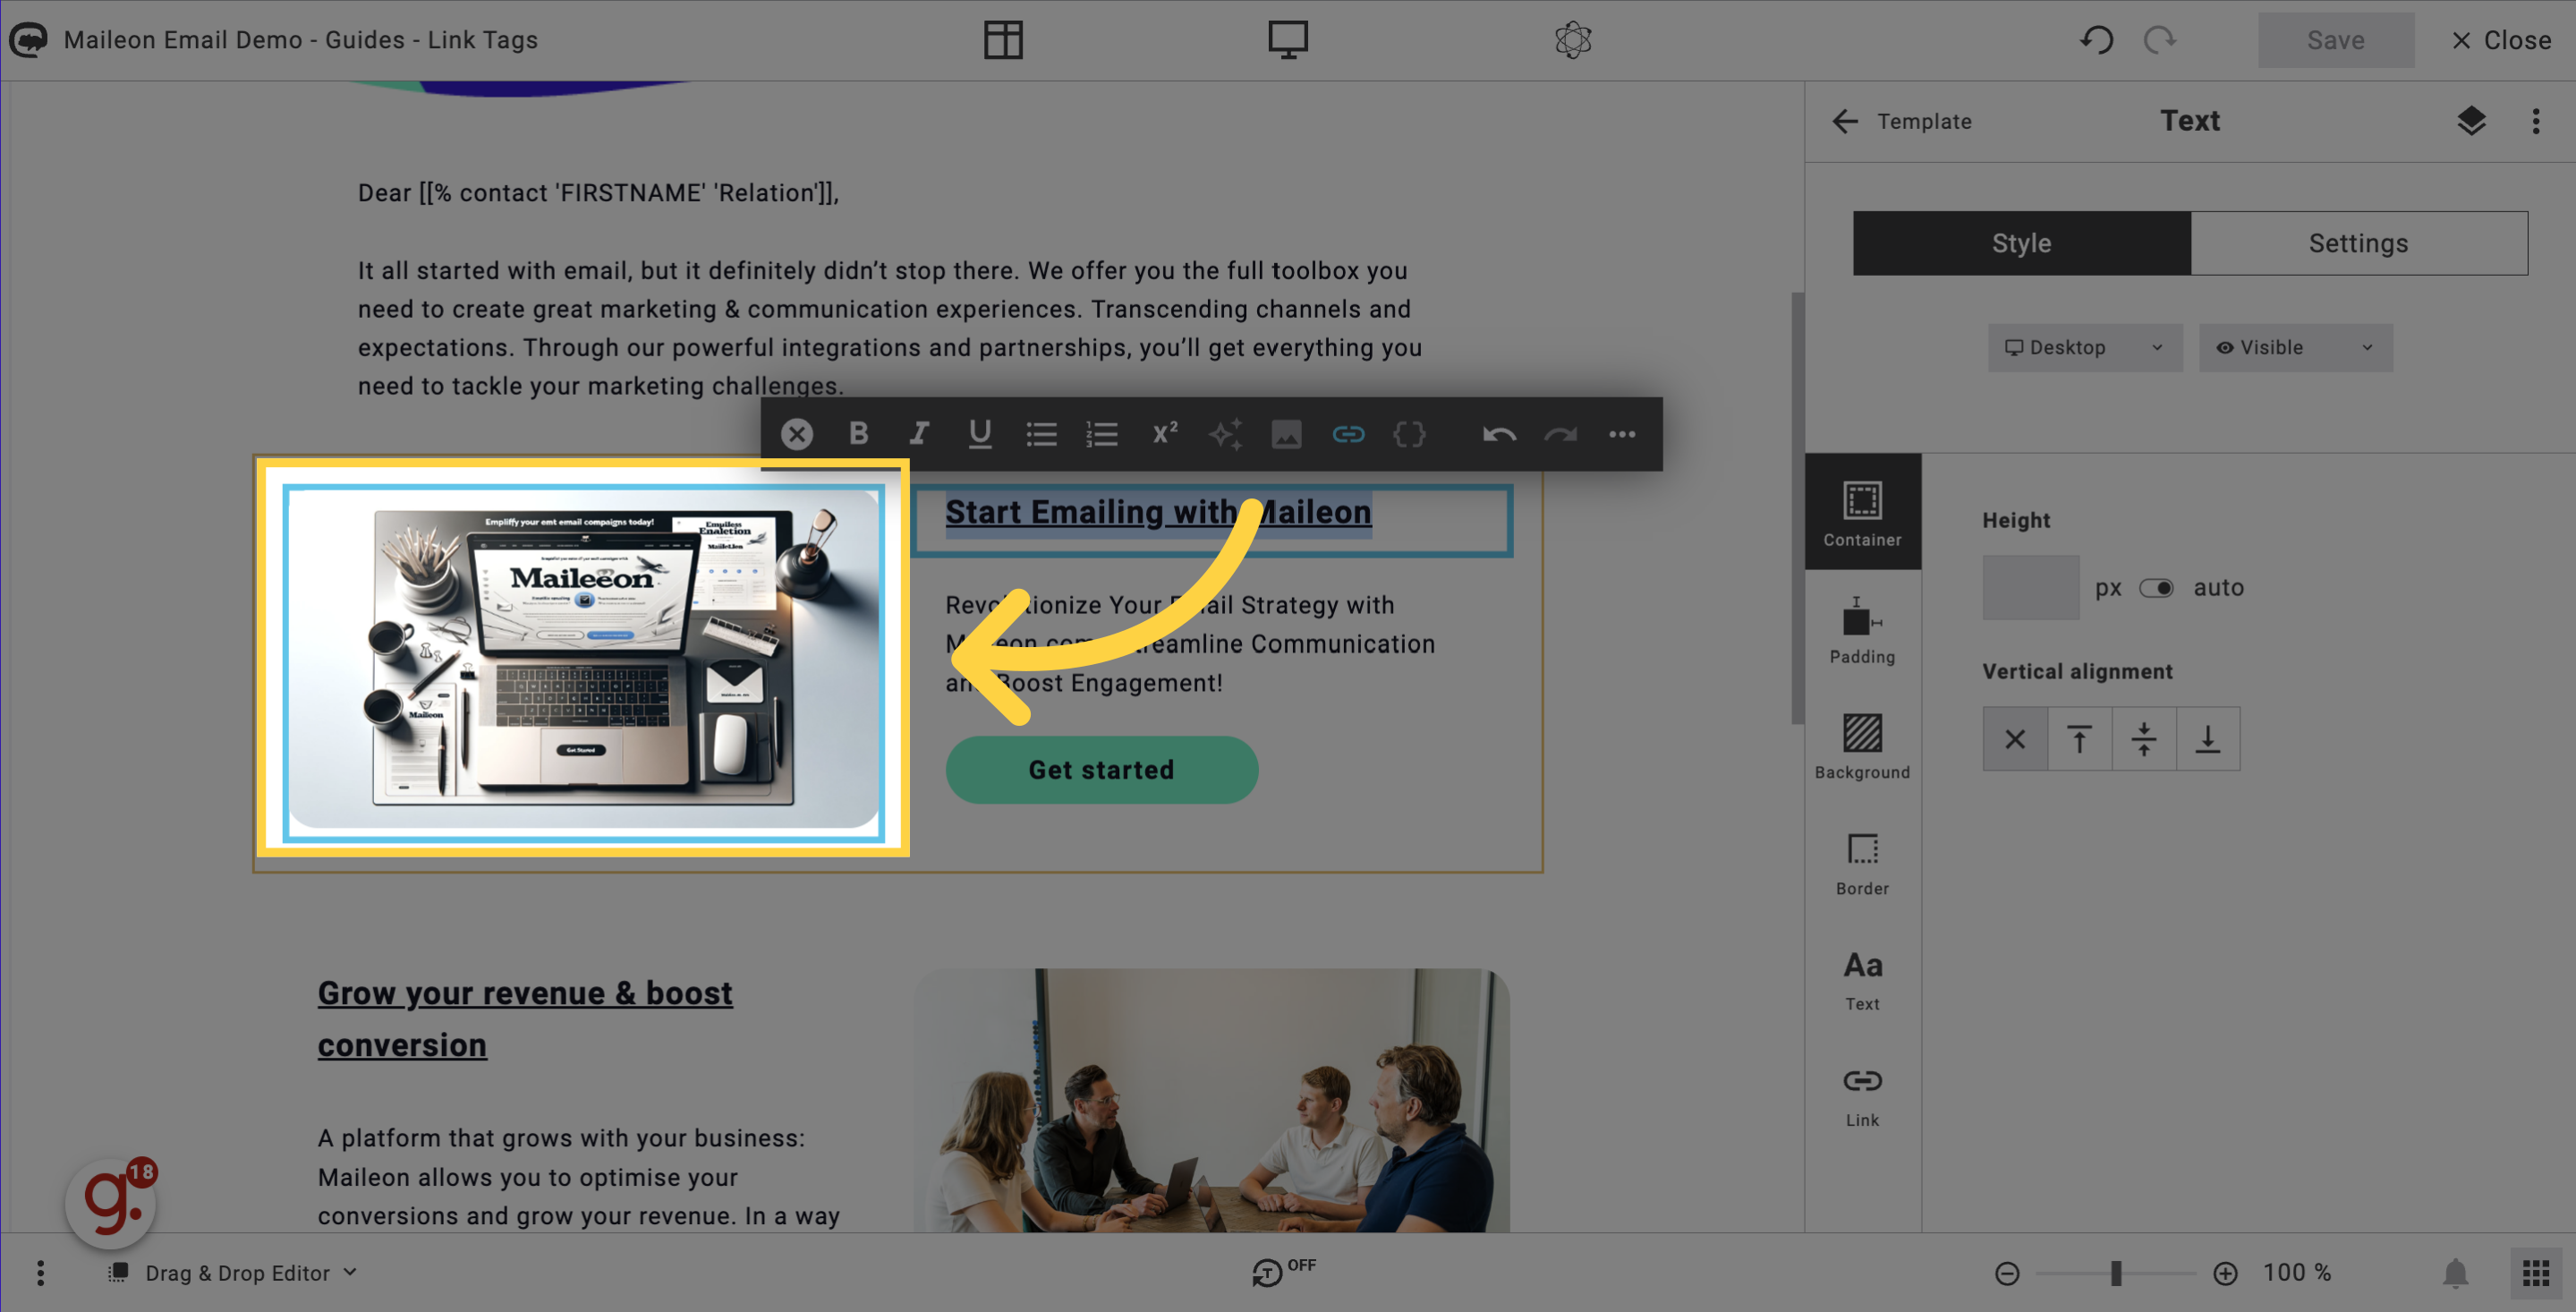
8. Repeat steps for other elements
Repeat steps for other elements, like a clickable title.
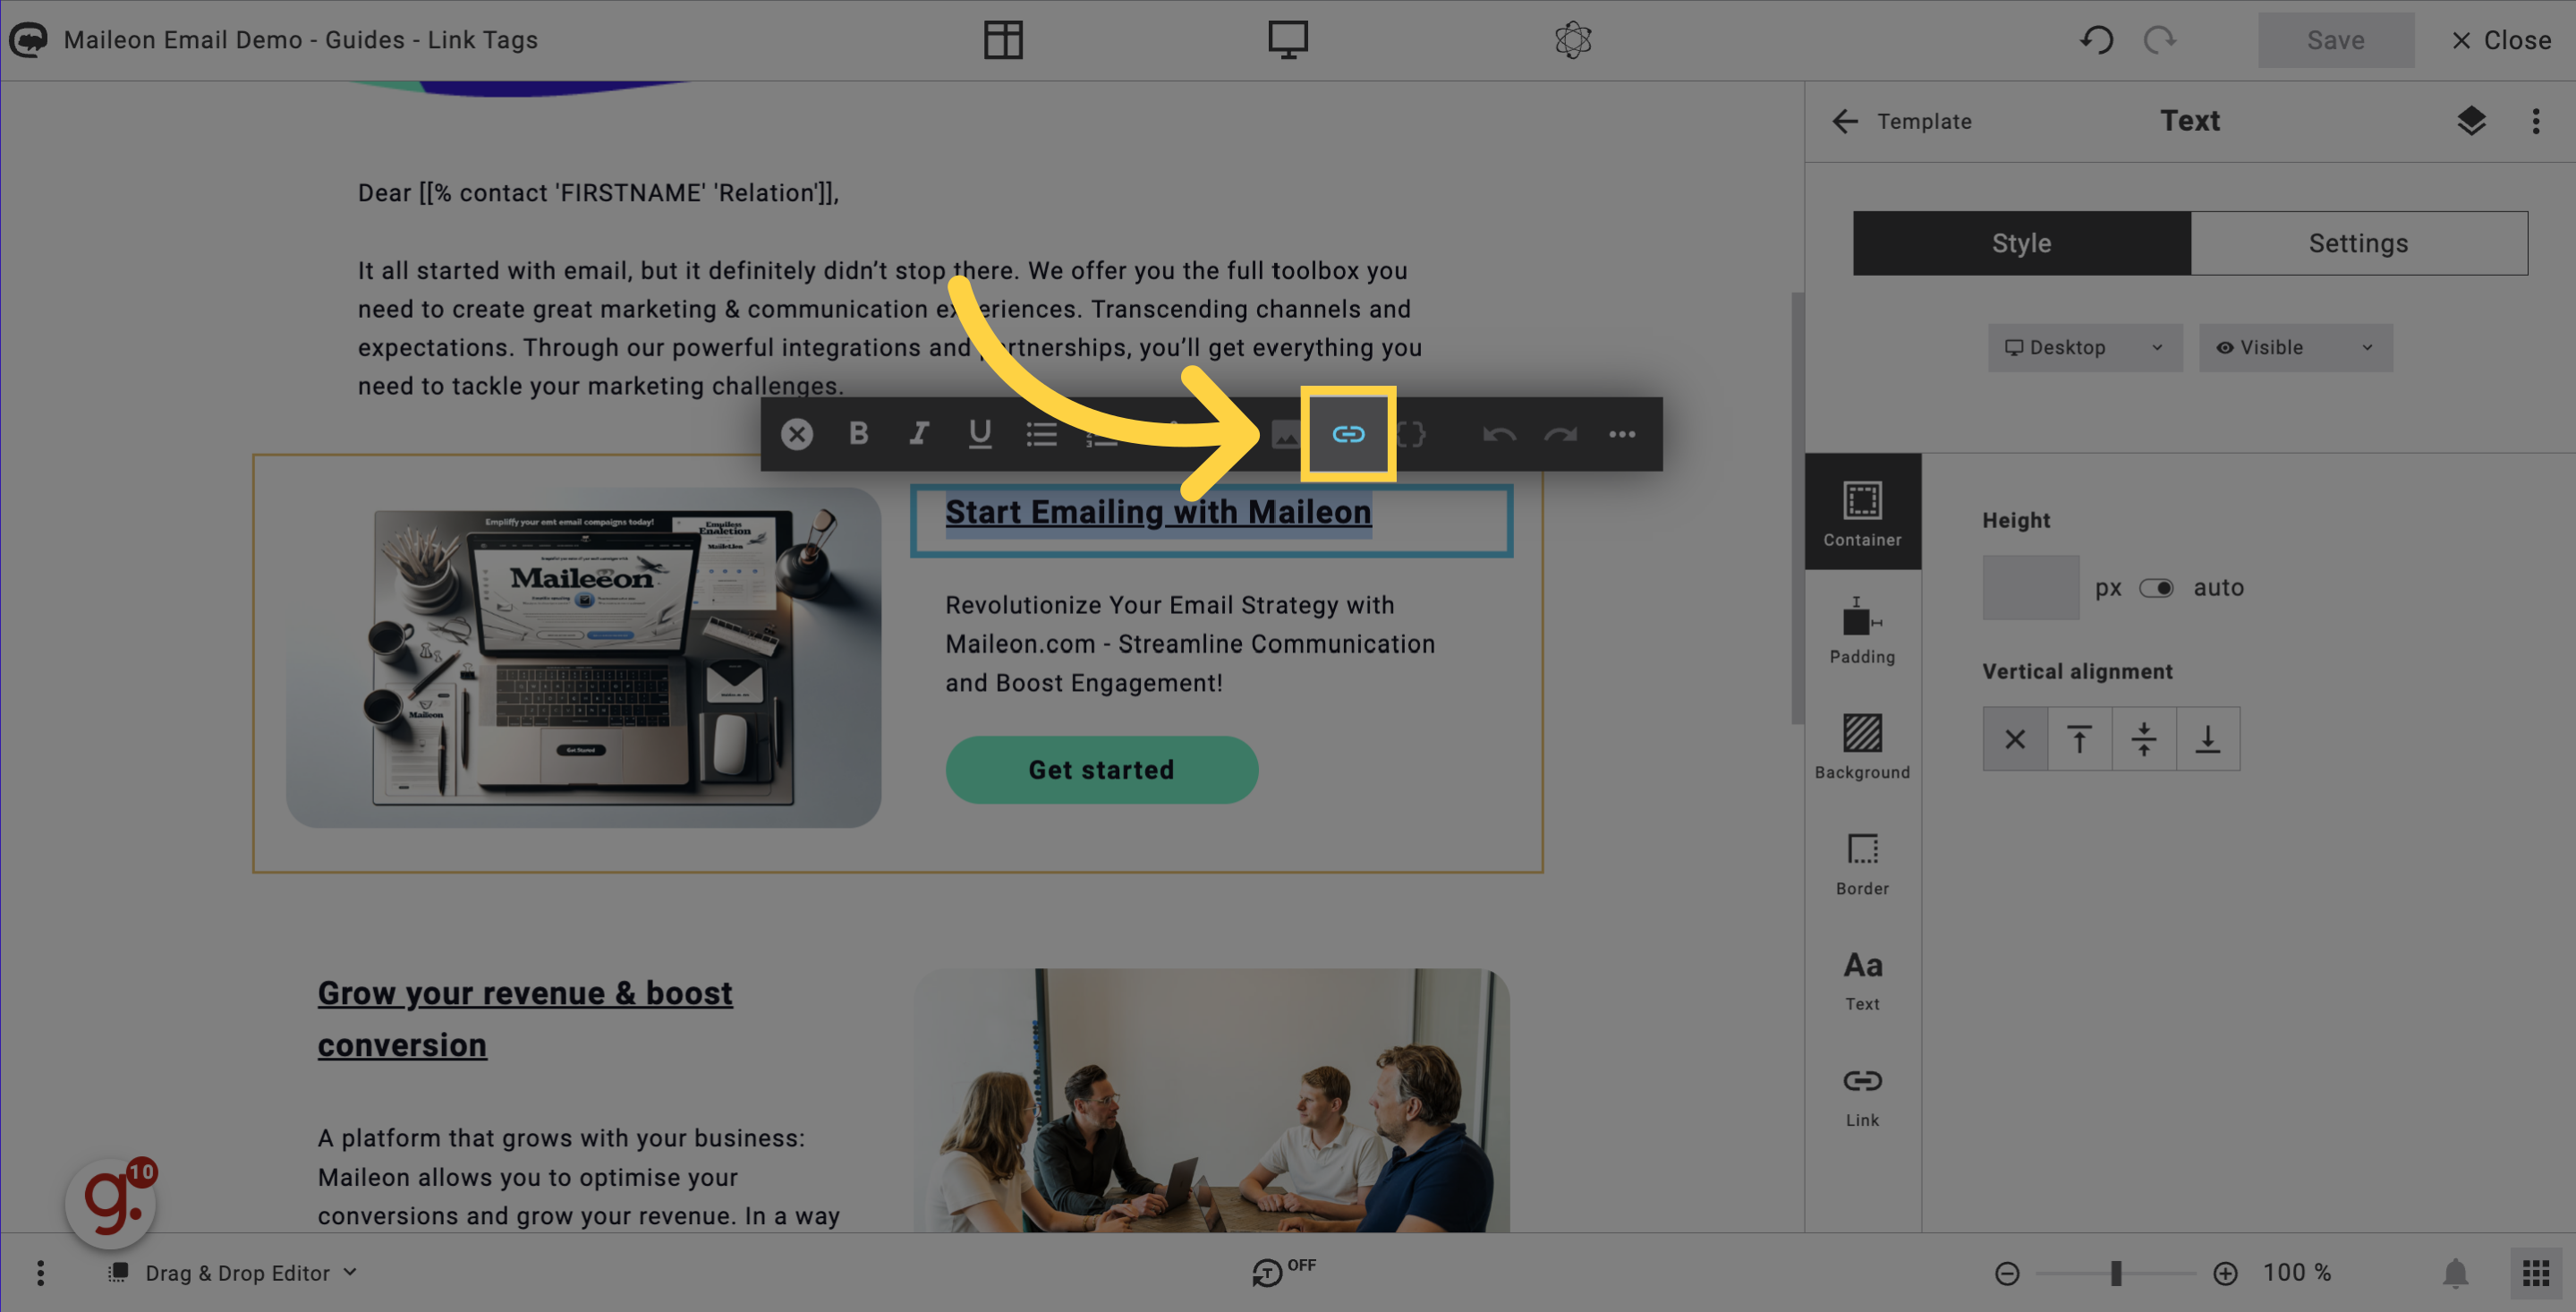
9. Edit the link
Edit the link of the title.
10. Click "Add new tag"
Click on the "Add new tag" button to create a new tag.

11. Fill "GetStarted"
Enter the text "GetStarted" in the specified field.
12. Fill "Add new tag"
Enter the desired text in the "Add new tag" field.
13. Click "Add link"
Click on the "Add link" button to add a new link.
14. Repeat steps for image
Repeat steps for other elements, like an image
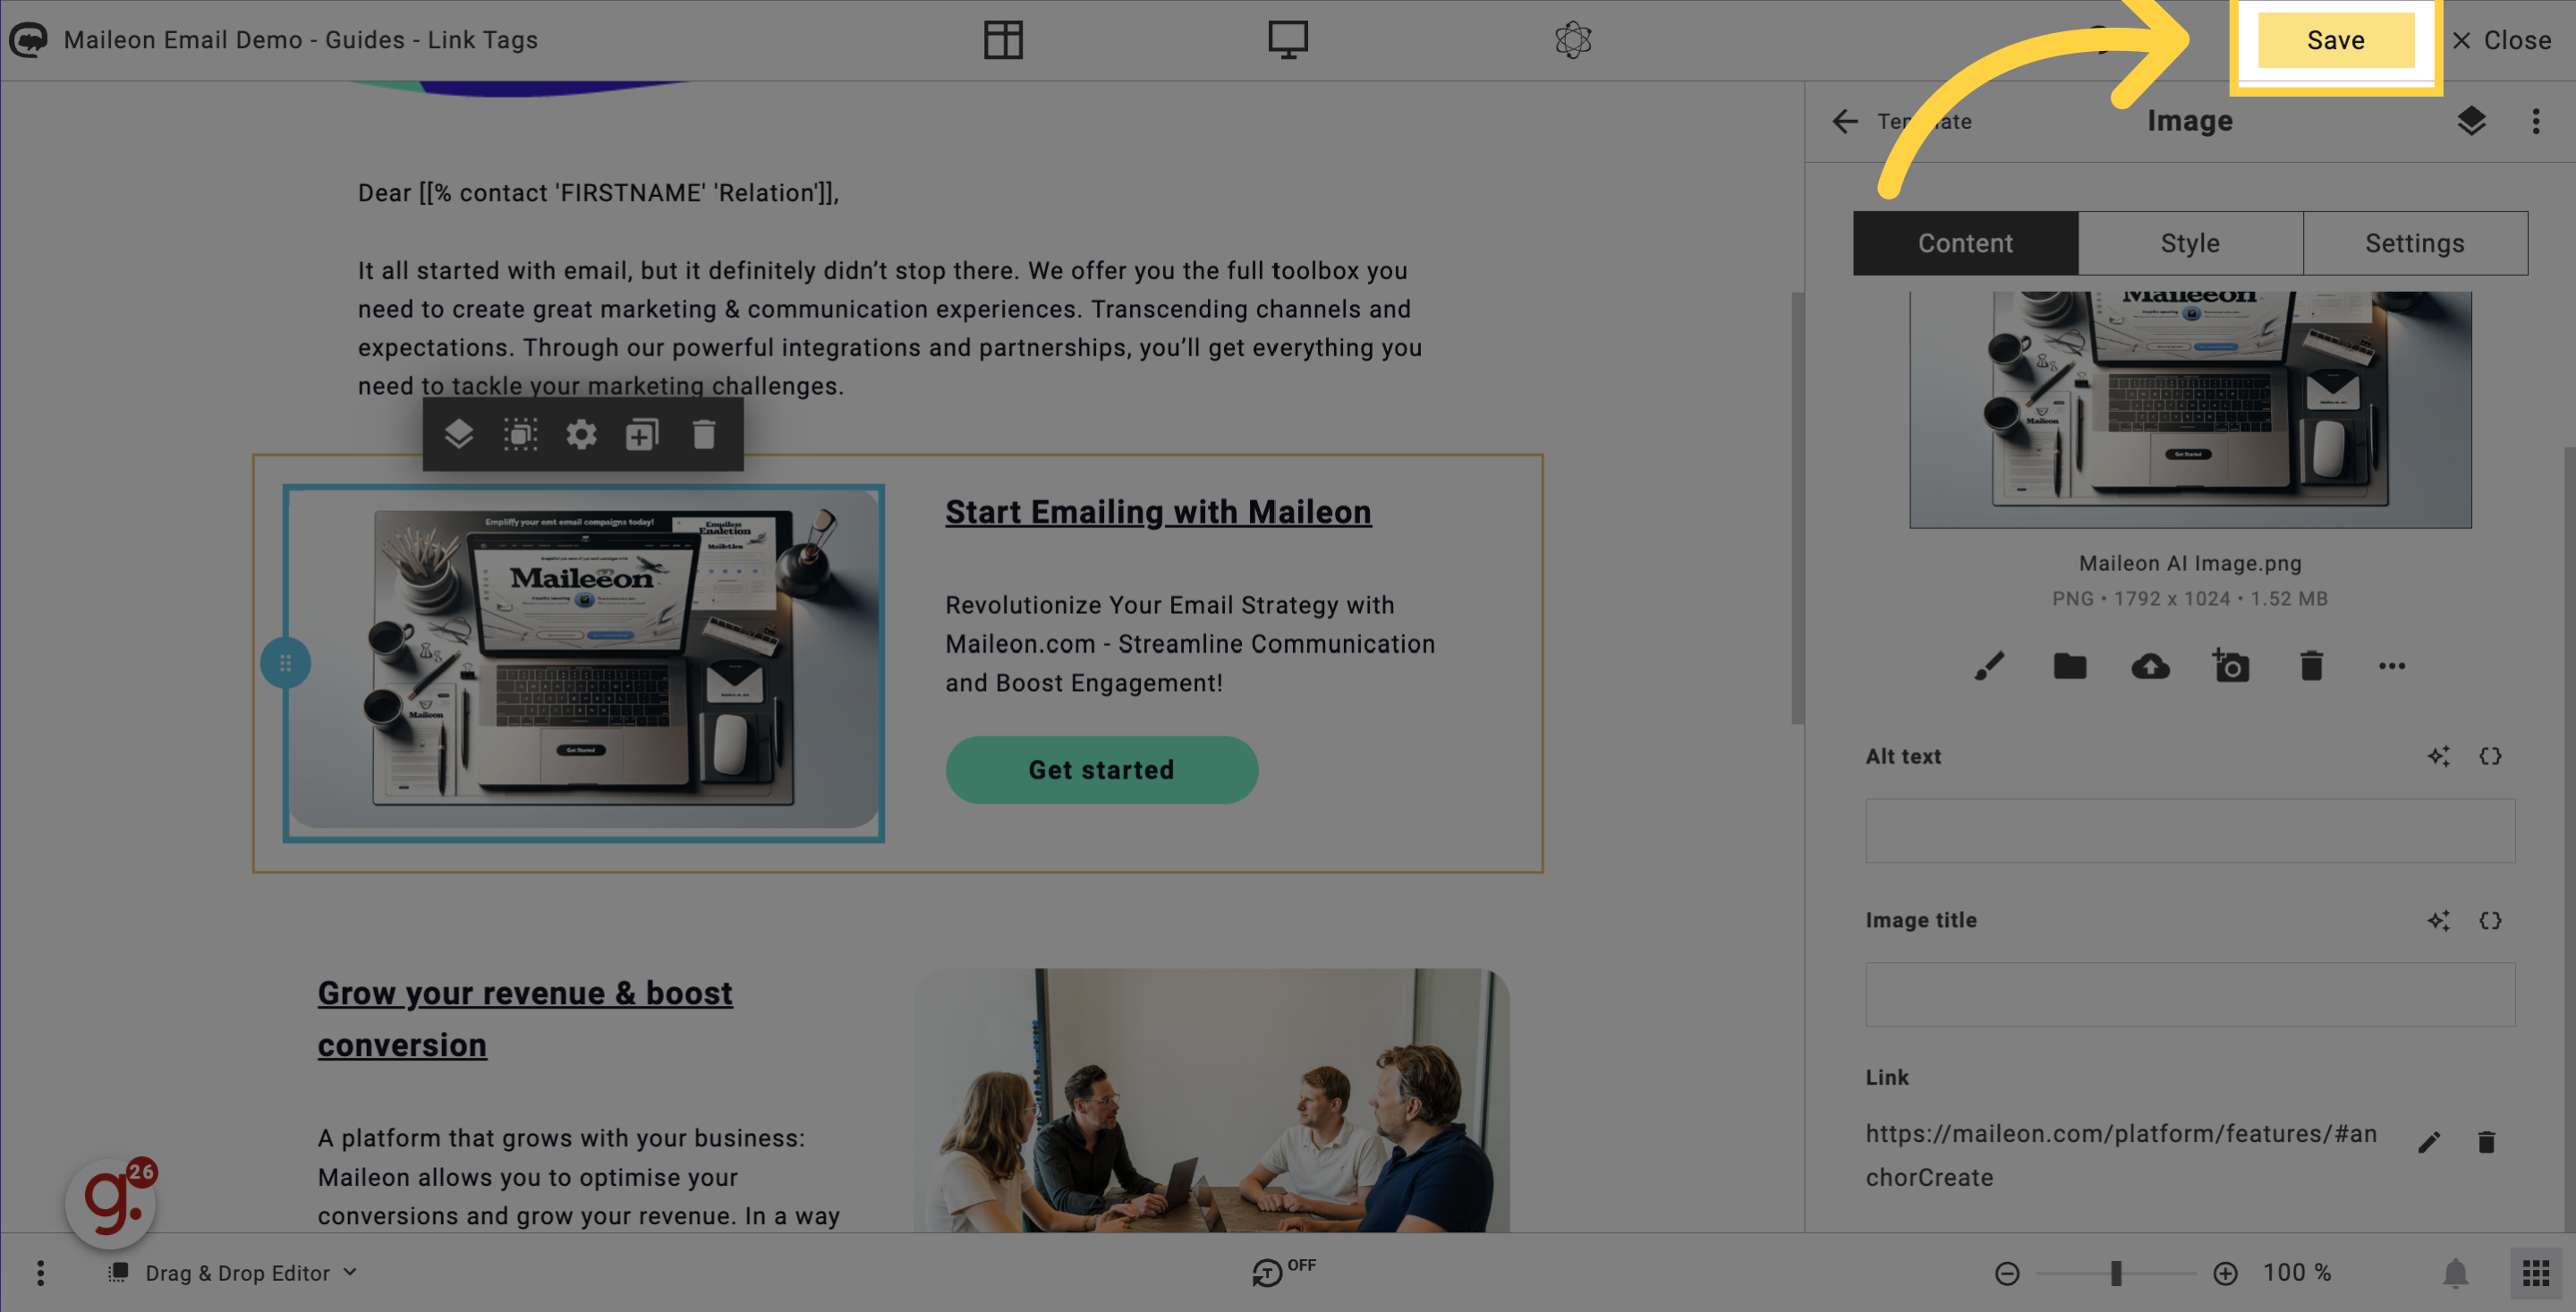
15. Click "Save" to save the email
Click on the "Save" button to save your changes.
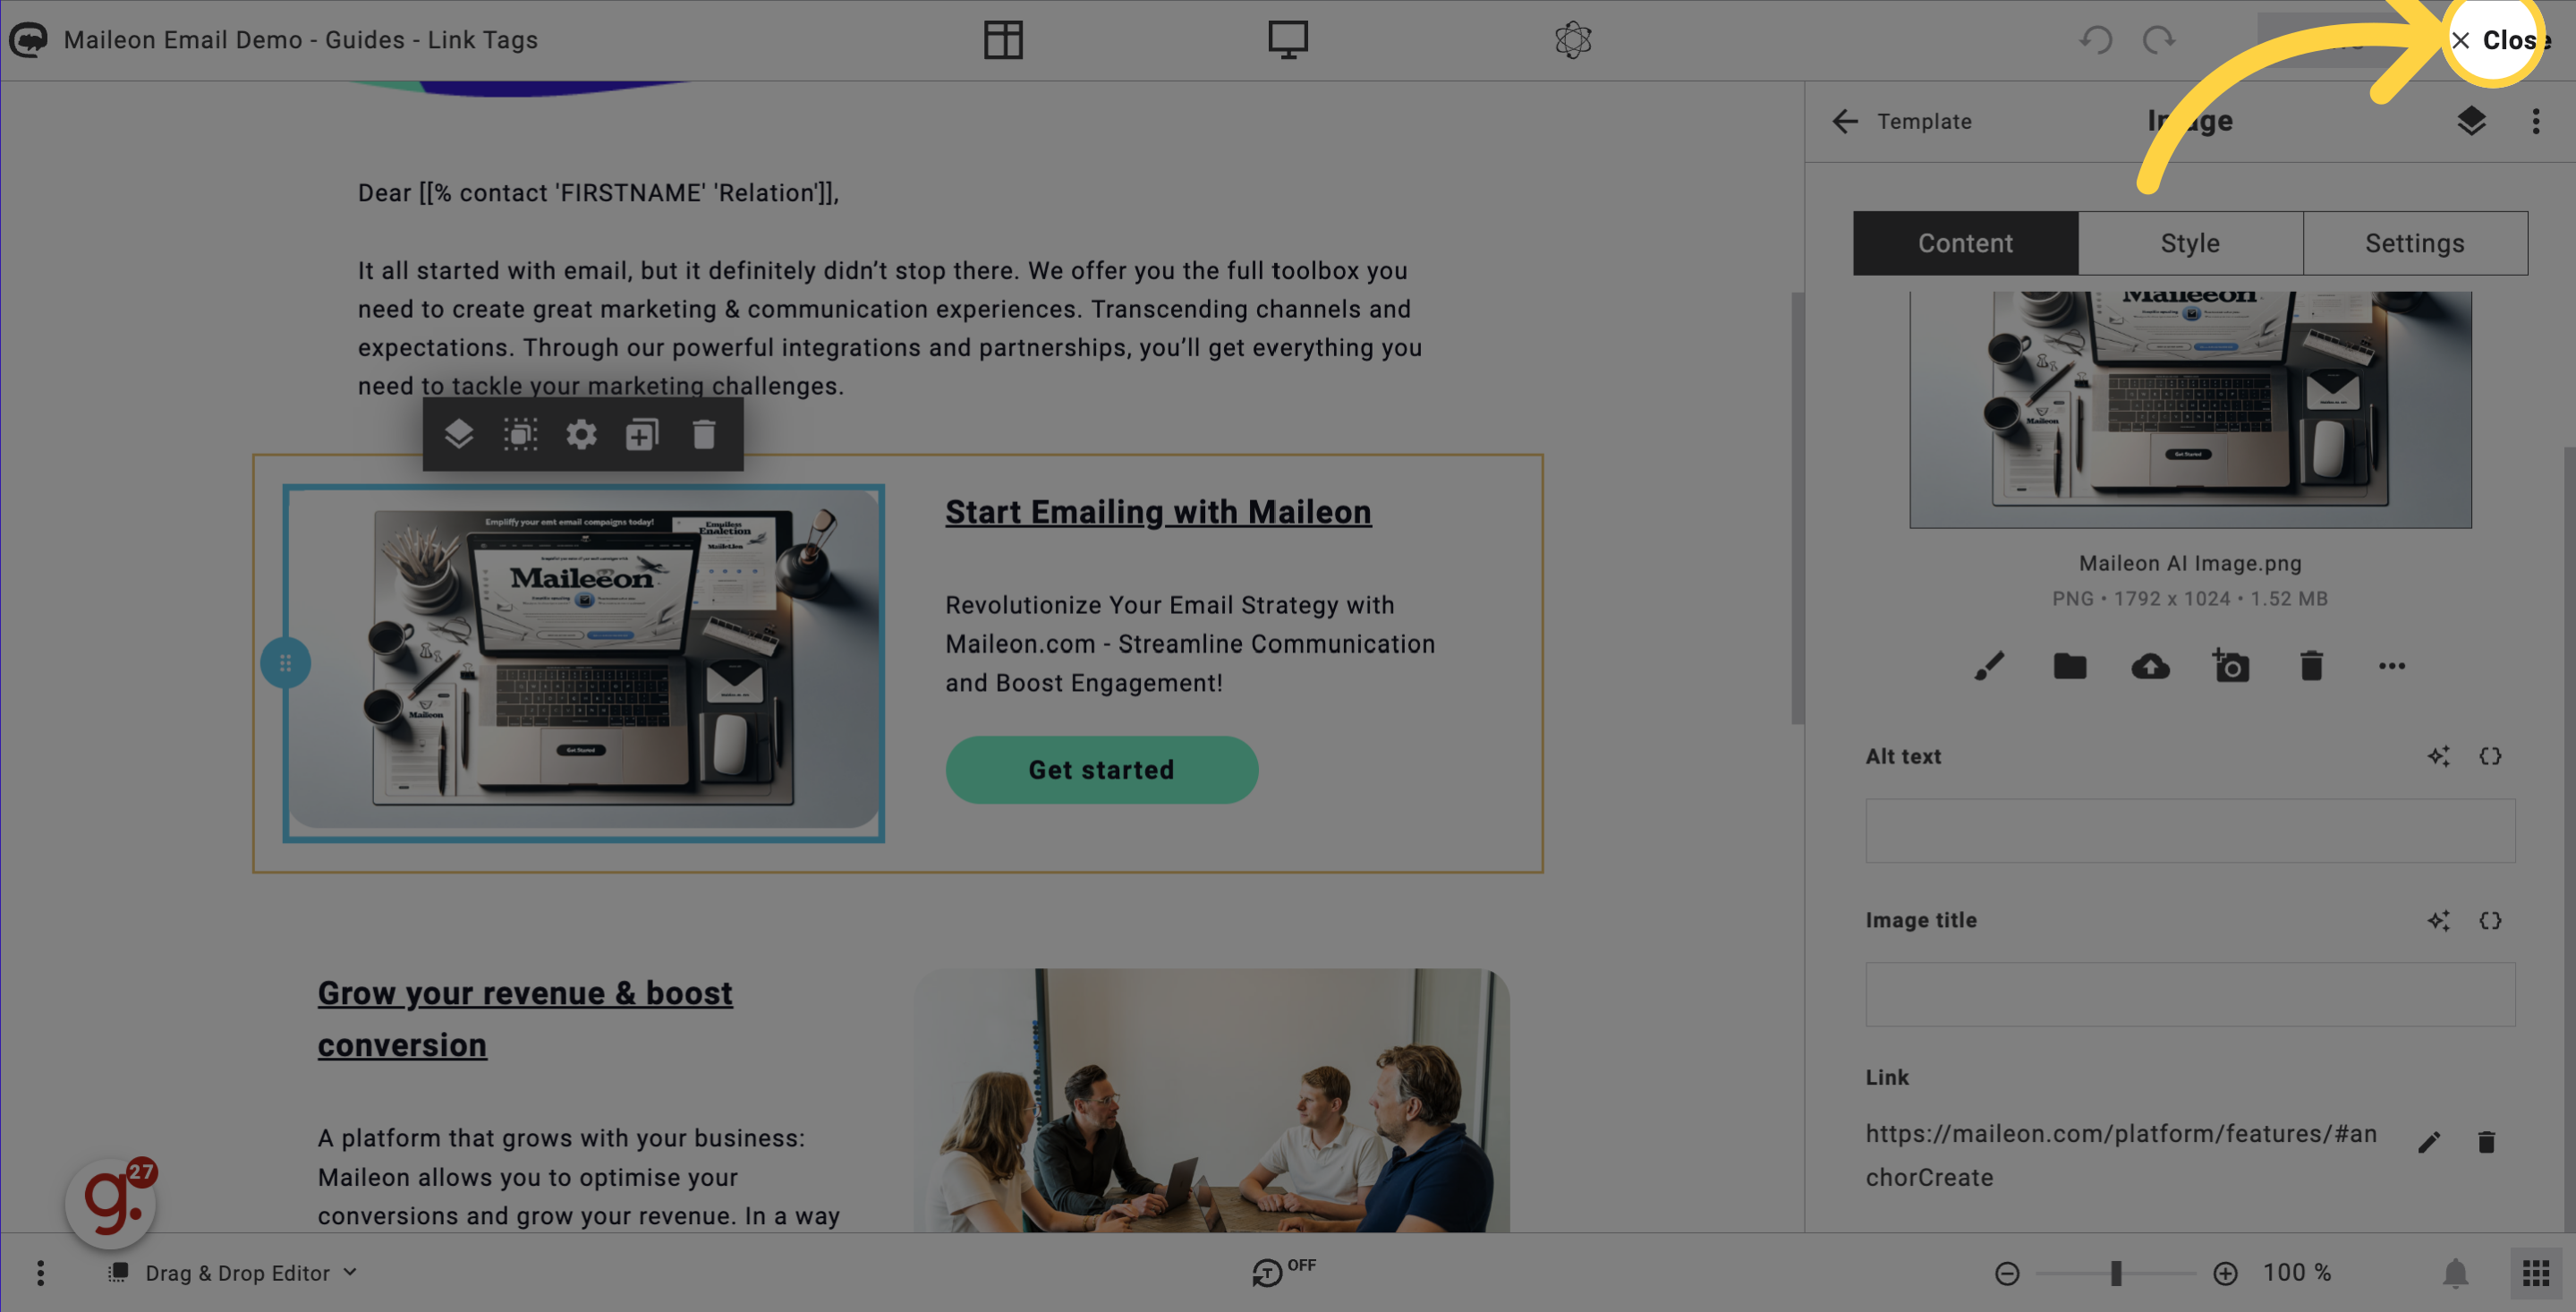
16. Click "Close"
Click on the "Close" button to exit the current window.
17. Dispatch your email to a target group or activate the trigger email.
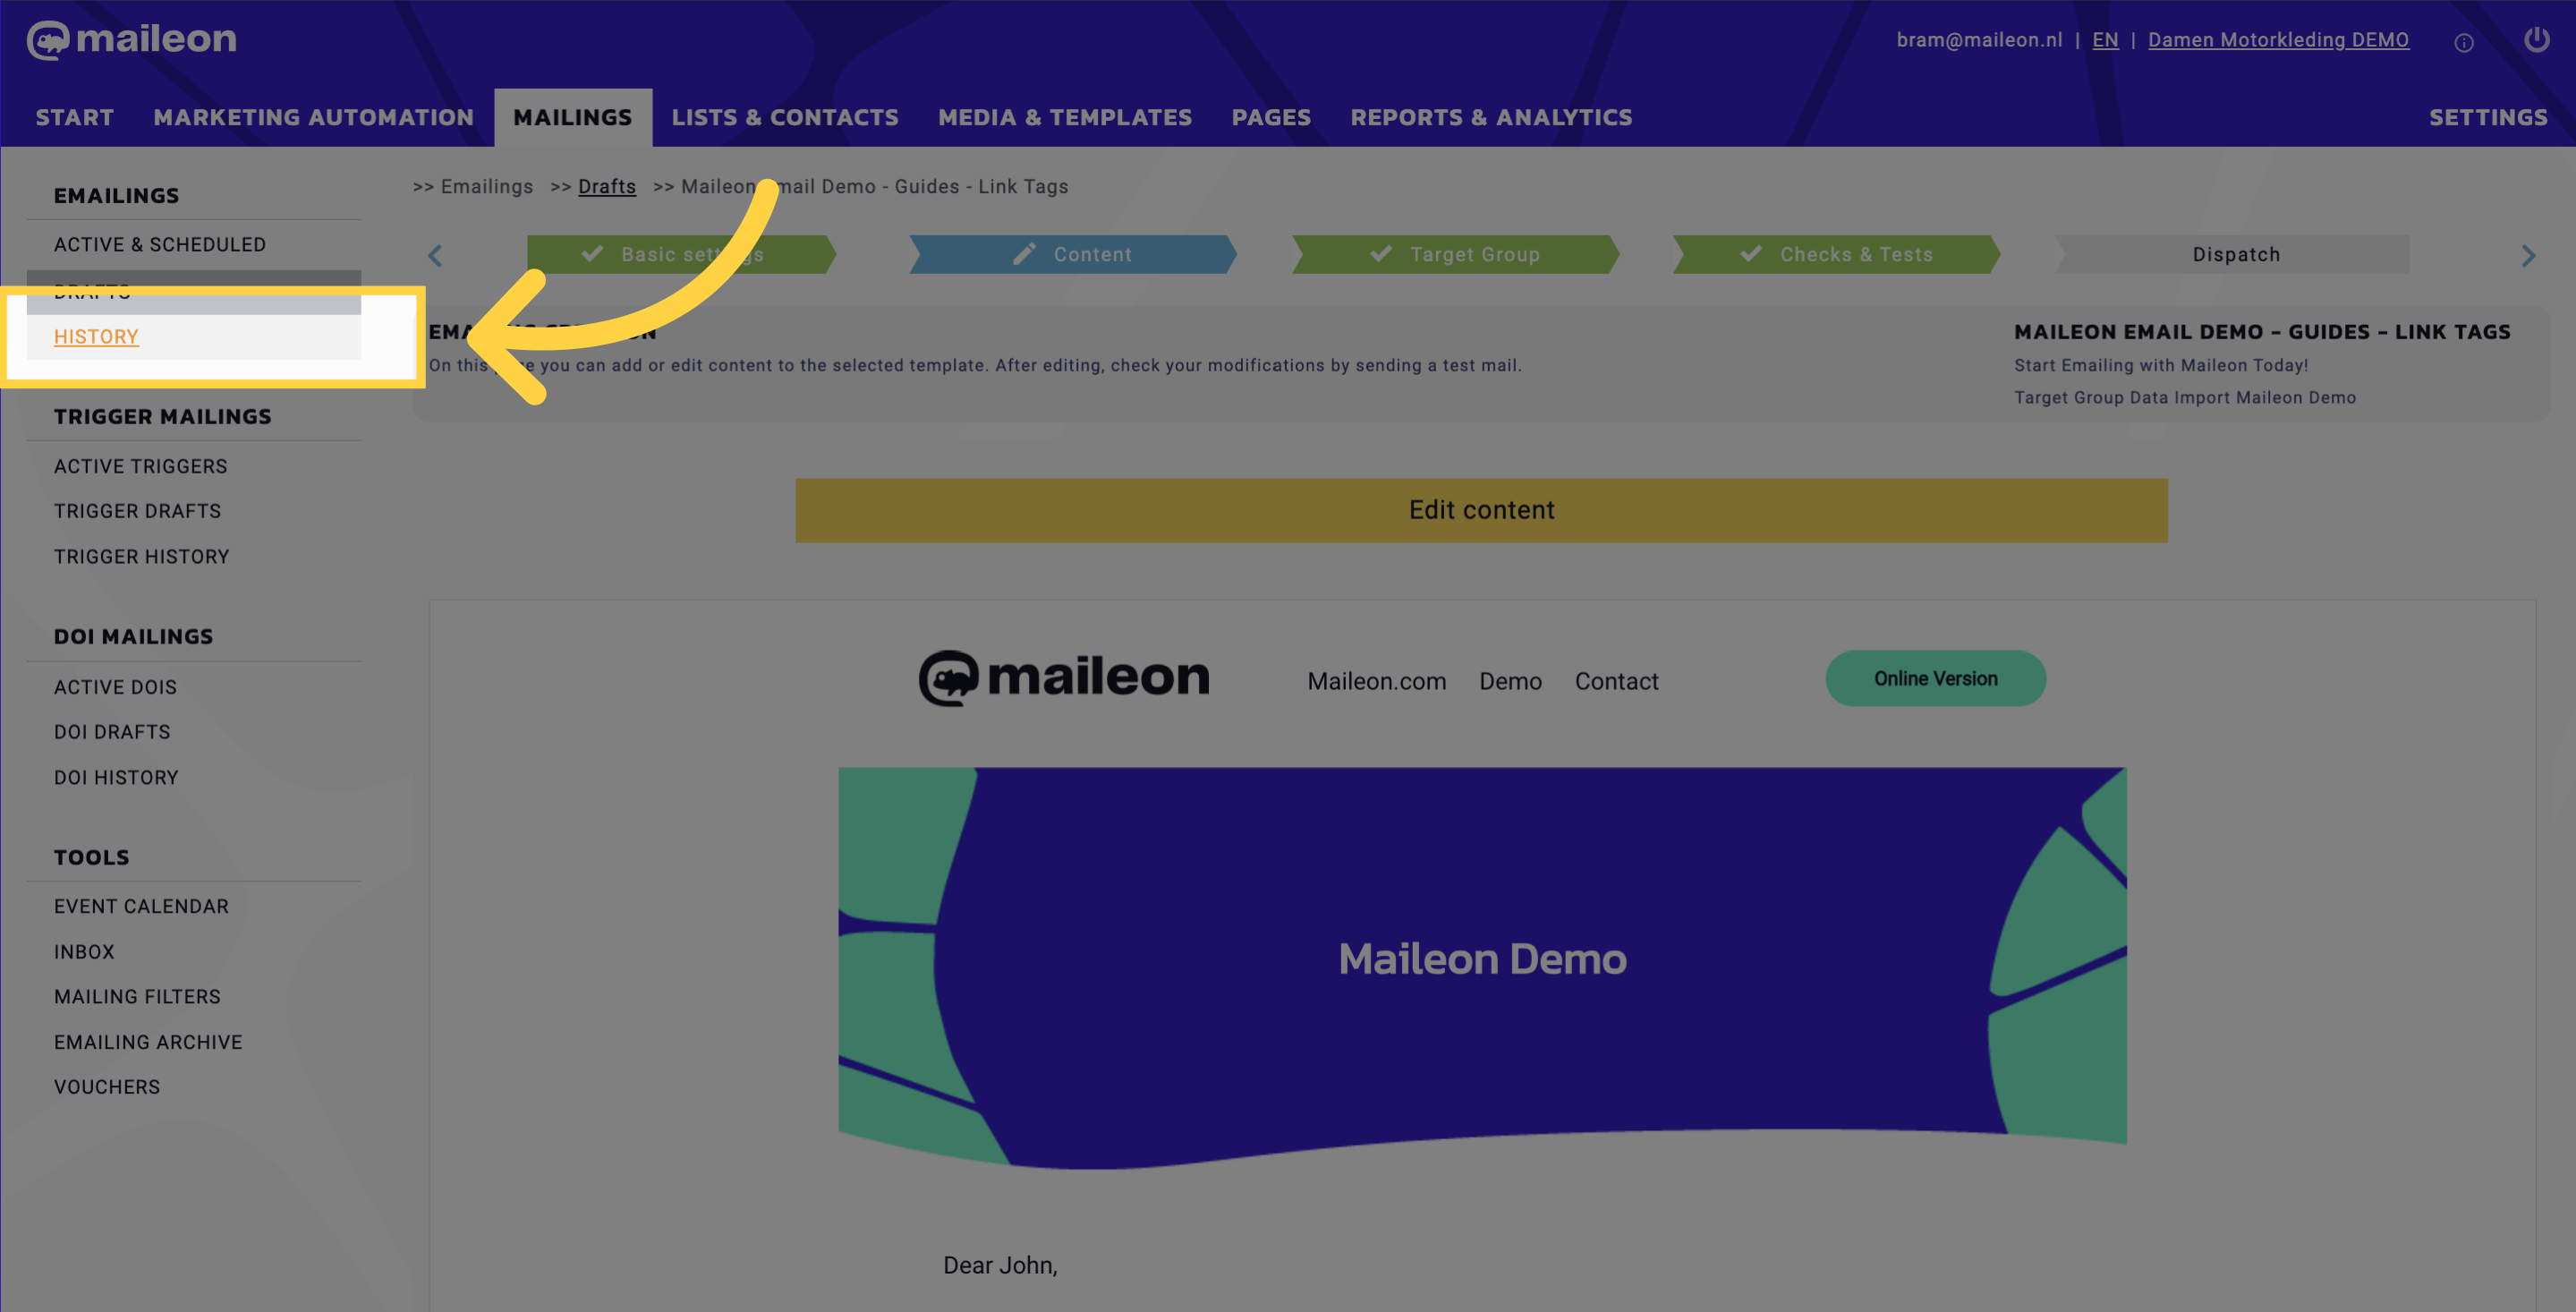
18. After dispatching your campaign, click "History"
After dispatching your campaign, click "History" under "Mailings".
19. Click on the dispatched campaign title
Click on the specified email campaign title to view the statistics.

20. Click "Show details"
Click on the "Show details" button to view additional information for Link Tags in your campaign report.

21. Check the grouped results
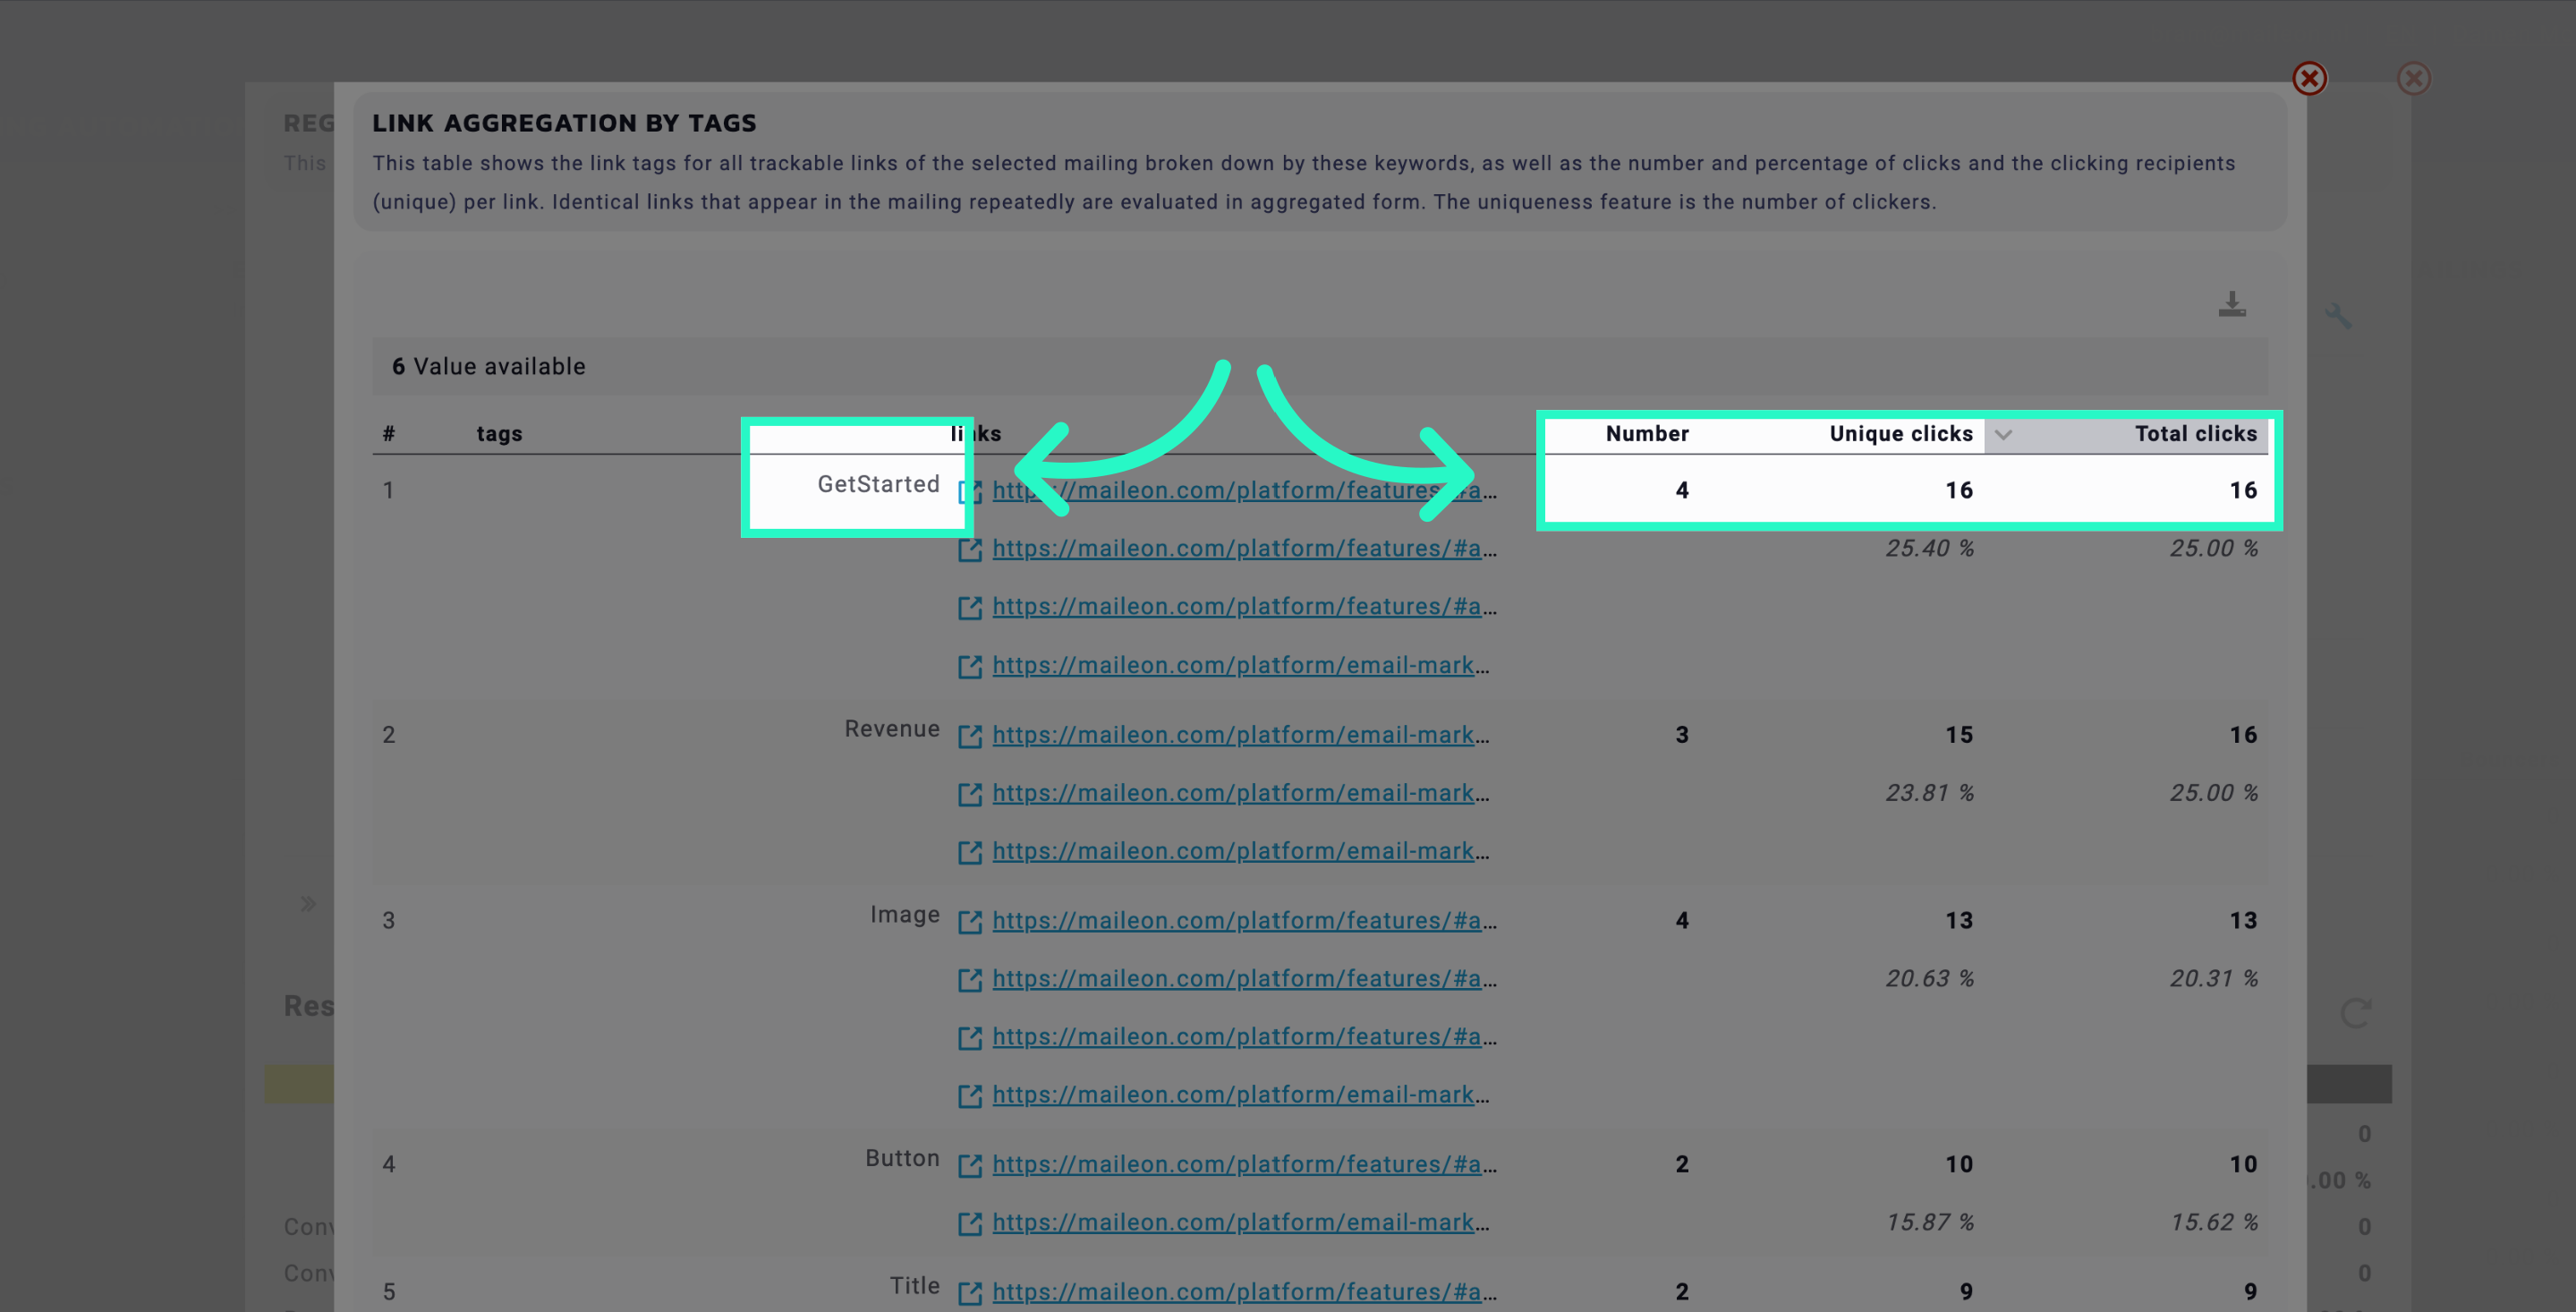
This guide covered the process of grouping or segmenting links in an email using Maileon. By following these steps, you can effectively organize your links and create personalized email content for your recipients.